Honda CB550 front brake rebuild & twin disc conversion
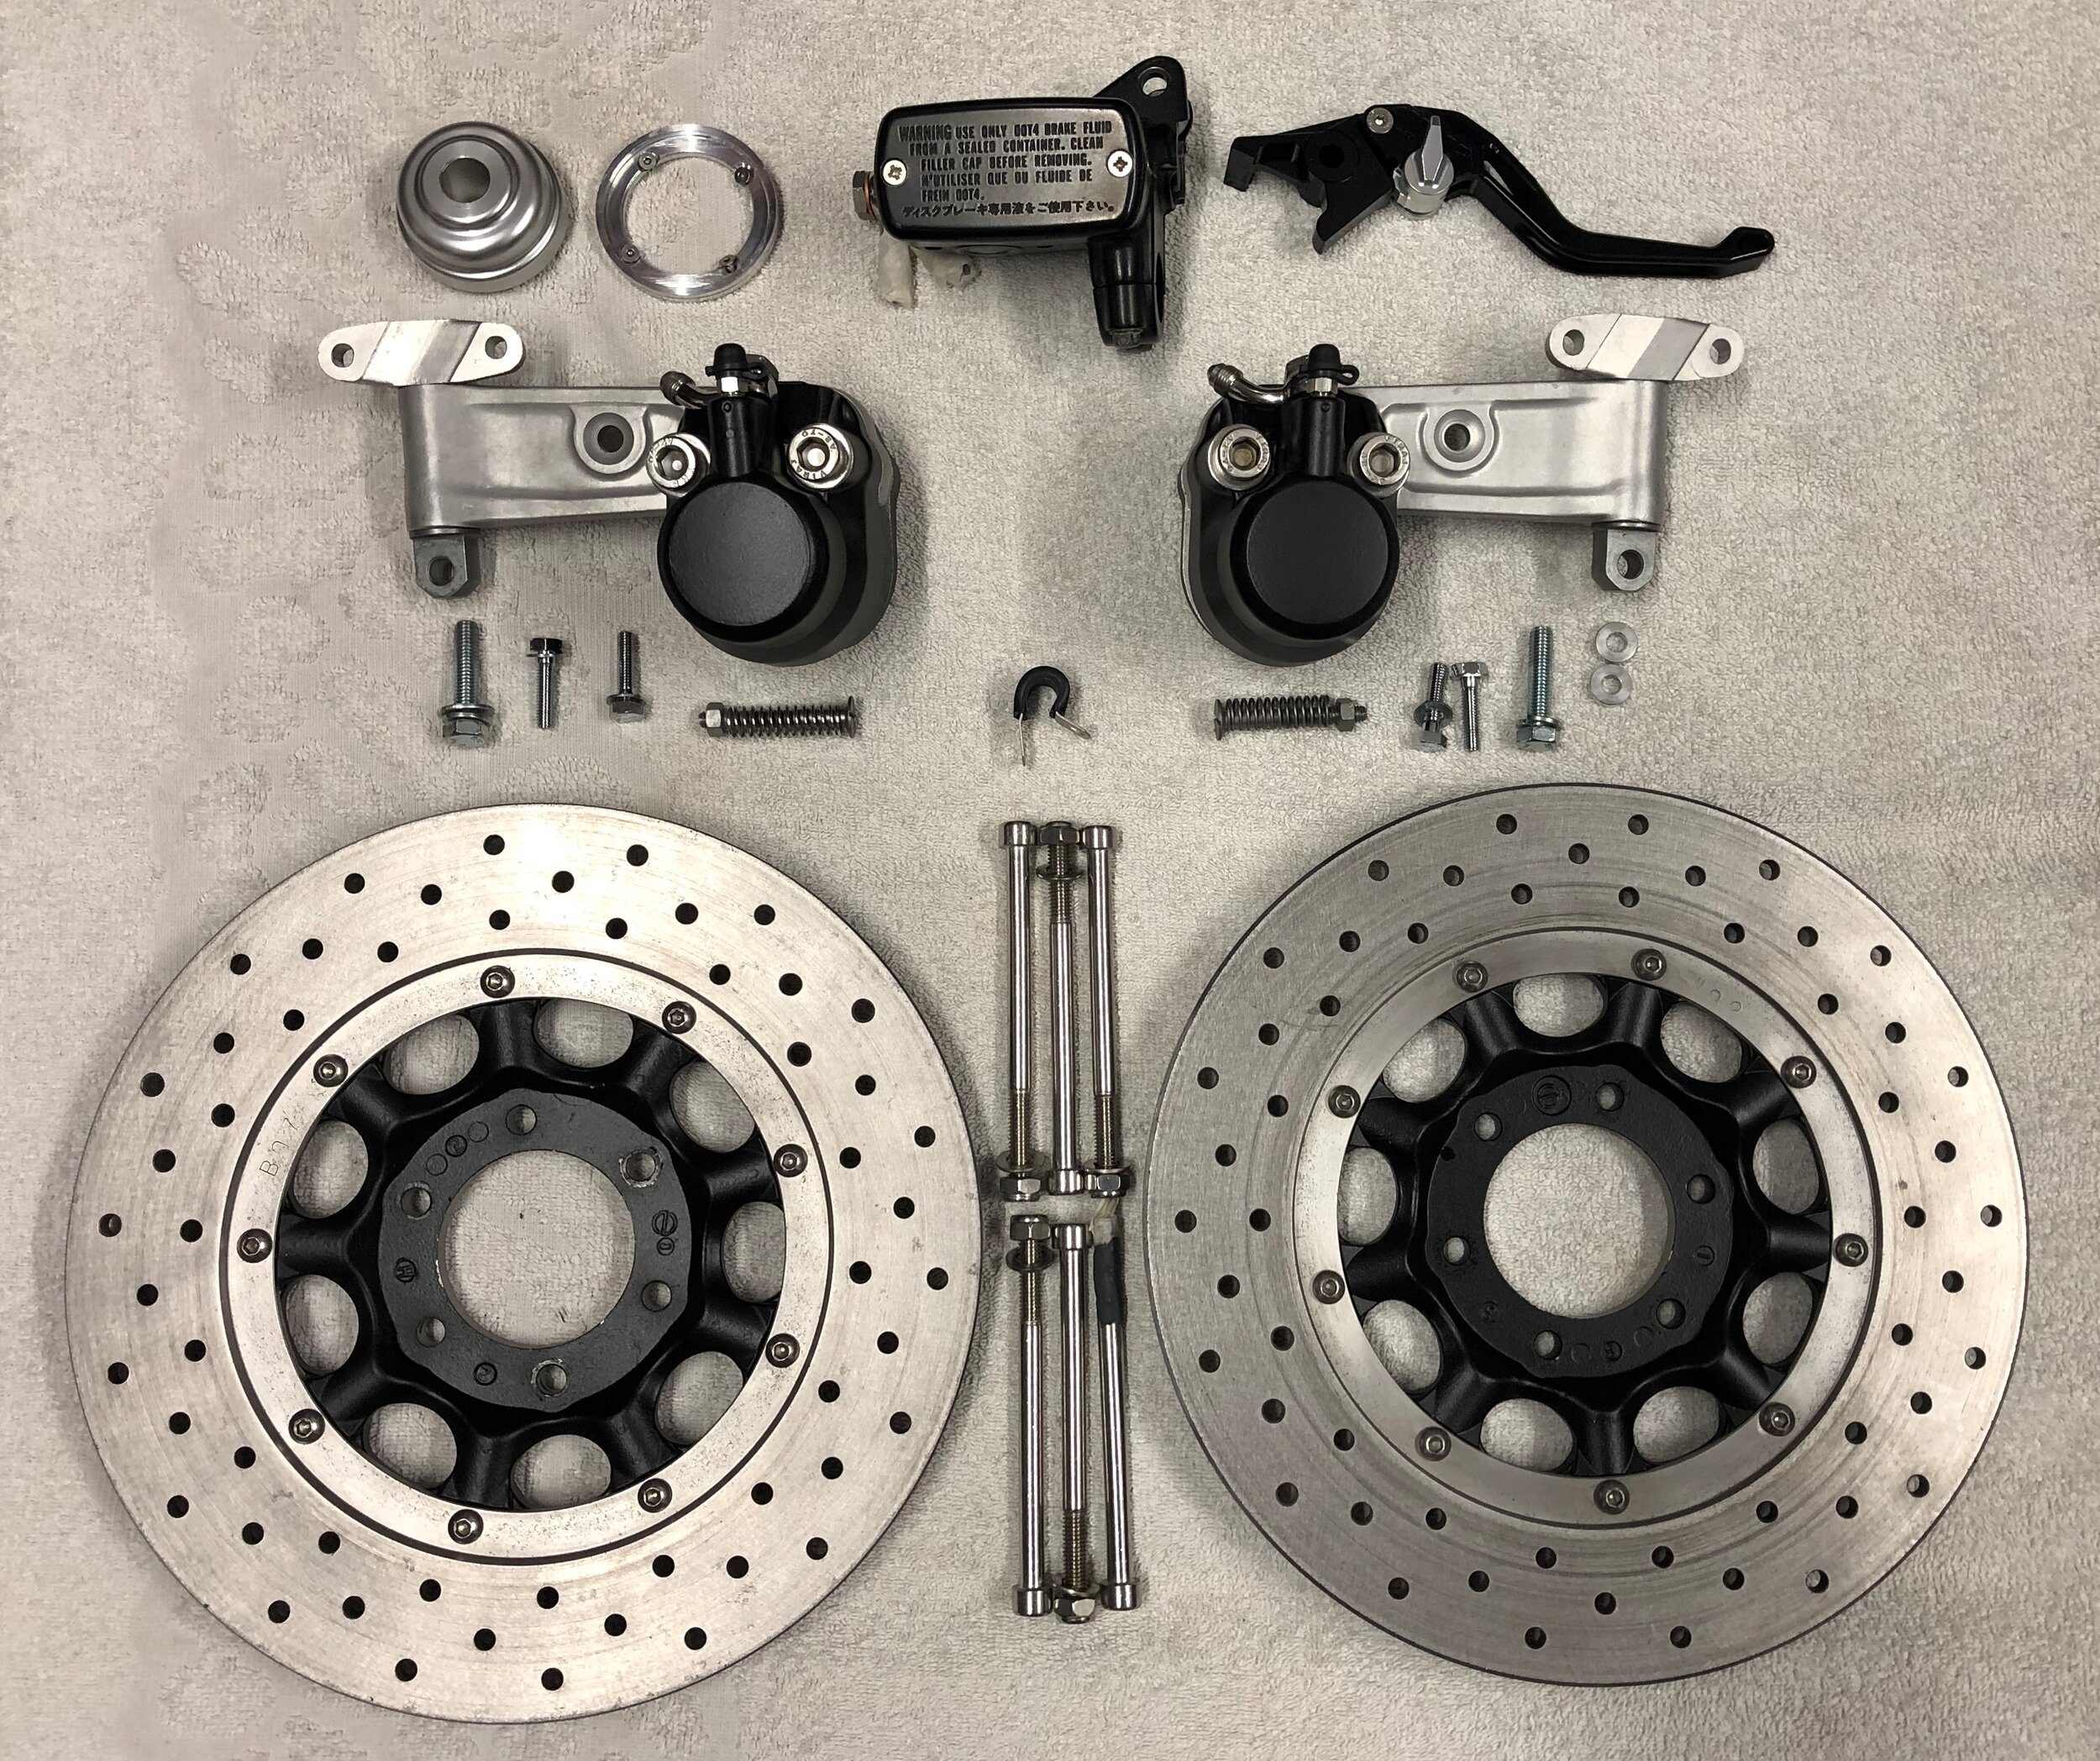
I decided to go with a twin caliper / disc set-up on my Honda CB550 cafe racer build. Originally, I was planned to switch to a GSX-R front end so it would have had two modern 4 pot sliding calipers and drilled discs. When I changed my mind and decided to keep the stock front end, the main thing on my mind was the older 1 pot caliper and solid disc. To help boost the braking performance I decided to do a twin caliper / disc conversion and to drill the discs.
Sourcing CB550 brake calipers and discs (rotors)
I’d already sold the caliper and disc from my donor bike as I was going down the GSX-R route. When I did the u-turn I started looking for calipers but they seemed pretty expensive for ones in poor condition. I picked up two on eBay, one in the U.K. for £40 and the other shipped from the states for £55.30. Most of the calipers on eBay had parts missing and when you investigate, it’s a similar price again for the missing parts. I held out to get entire calipers with bracket & adjuster.
I wasn’t even sure if i’d got the correct calipers. My bike is a CB550 K0 and the eBay listings for 550’s were rare. To be honest, apart from the CB750, the calipers on all the Honda SOHC bikes of the era looked the same to me even though the listing said CB500, 500T, 350, 400 etc. I ended up getting two listed as CB500T and, apart from different Tokico casting marks (one says T, the other 4), the parts are all identical.
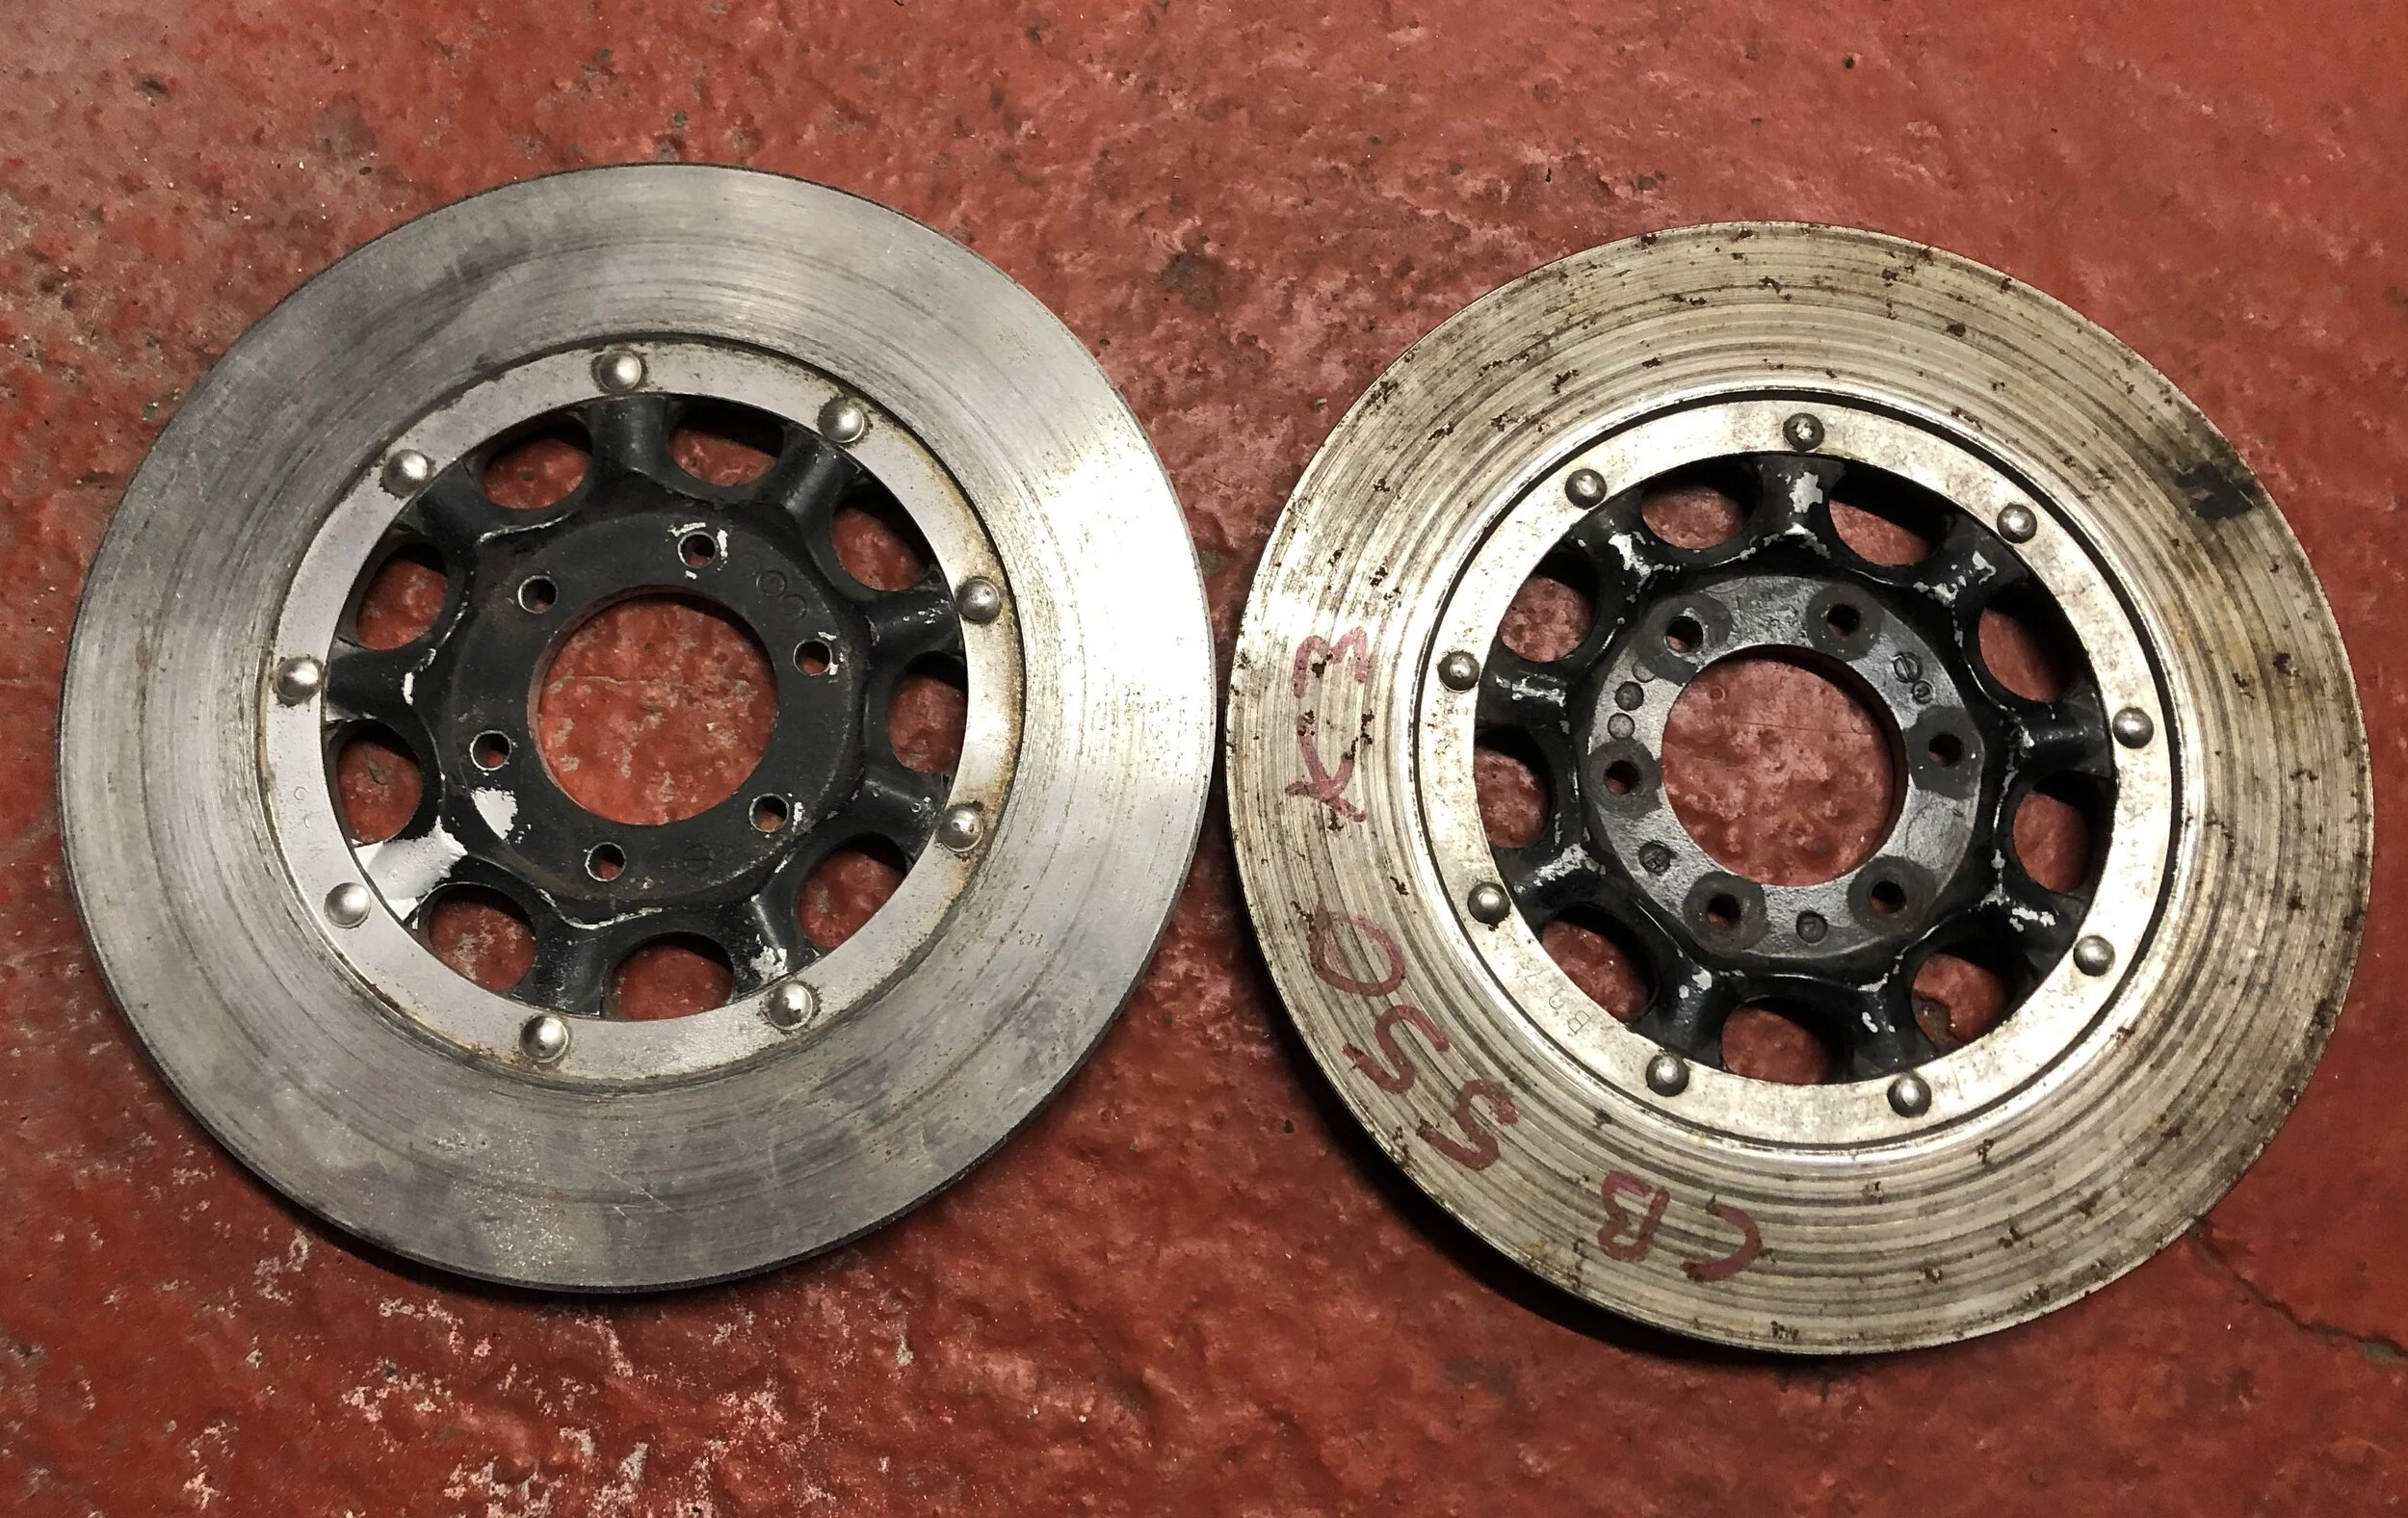
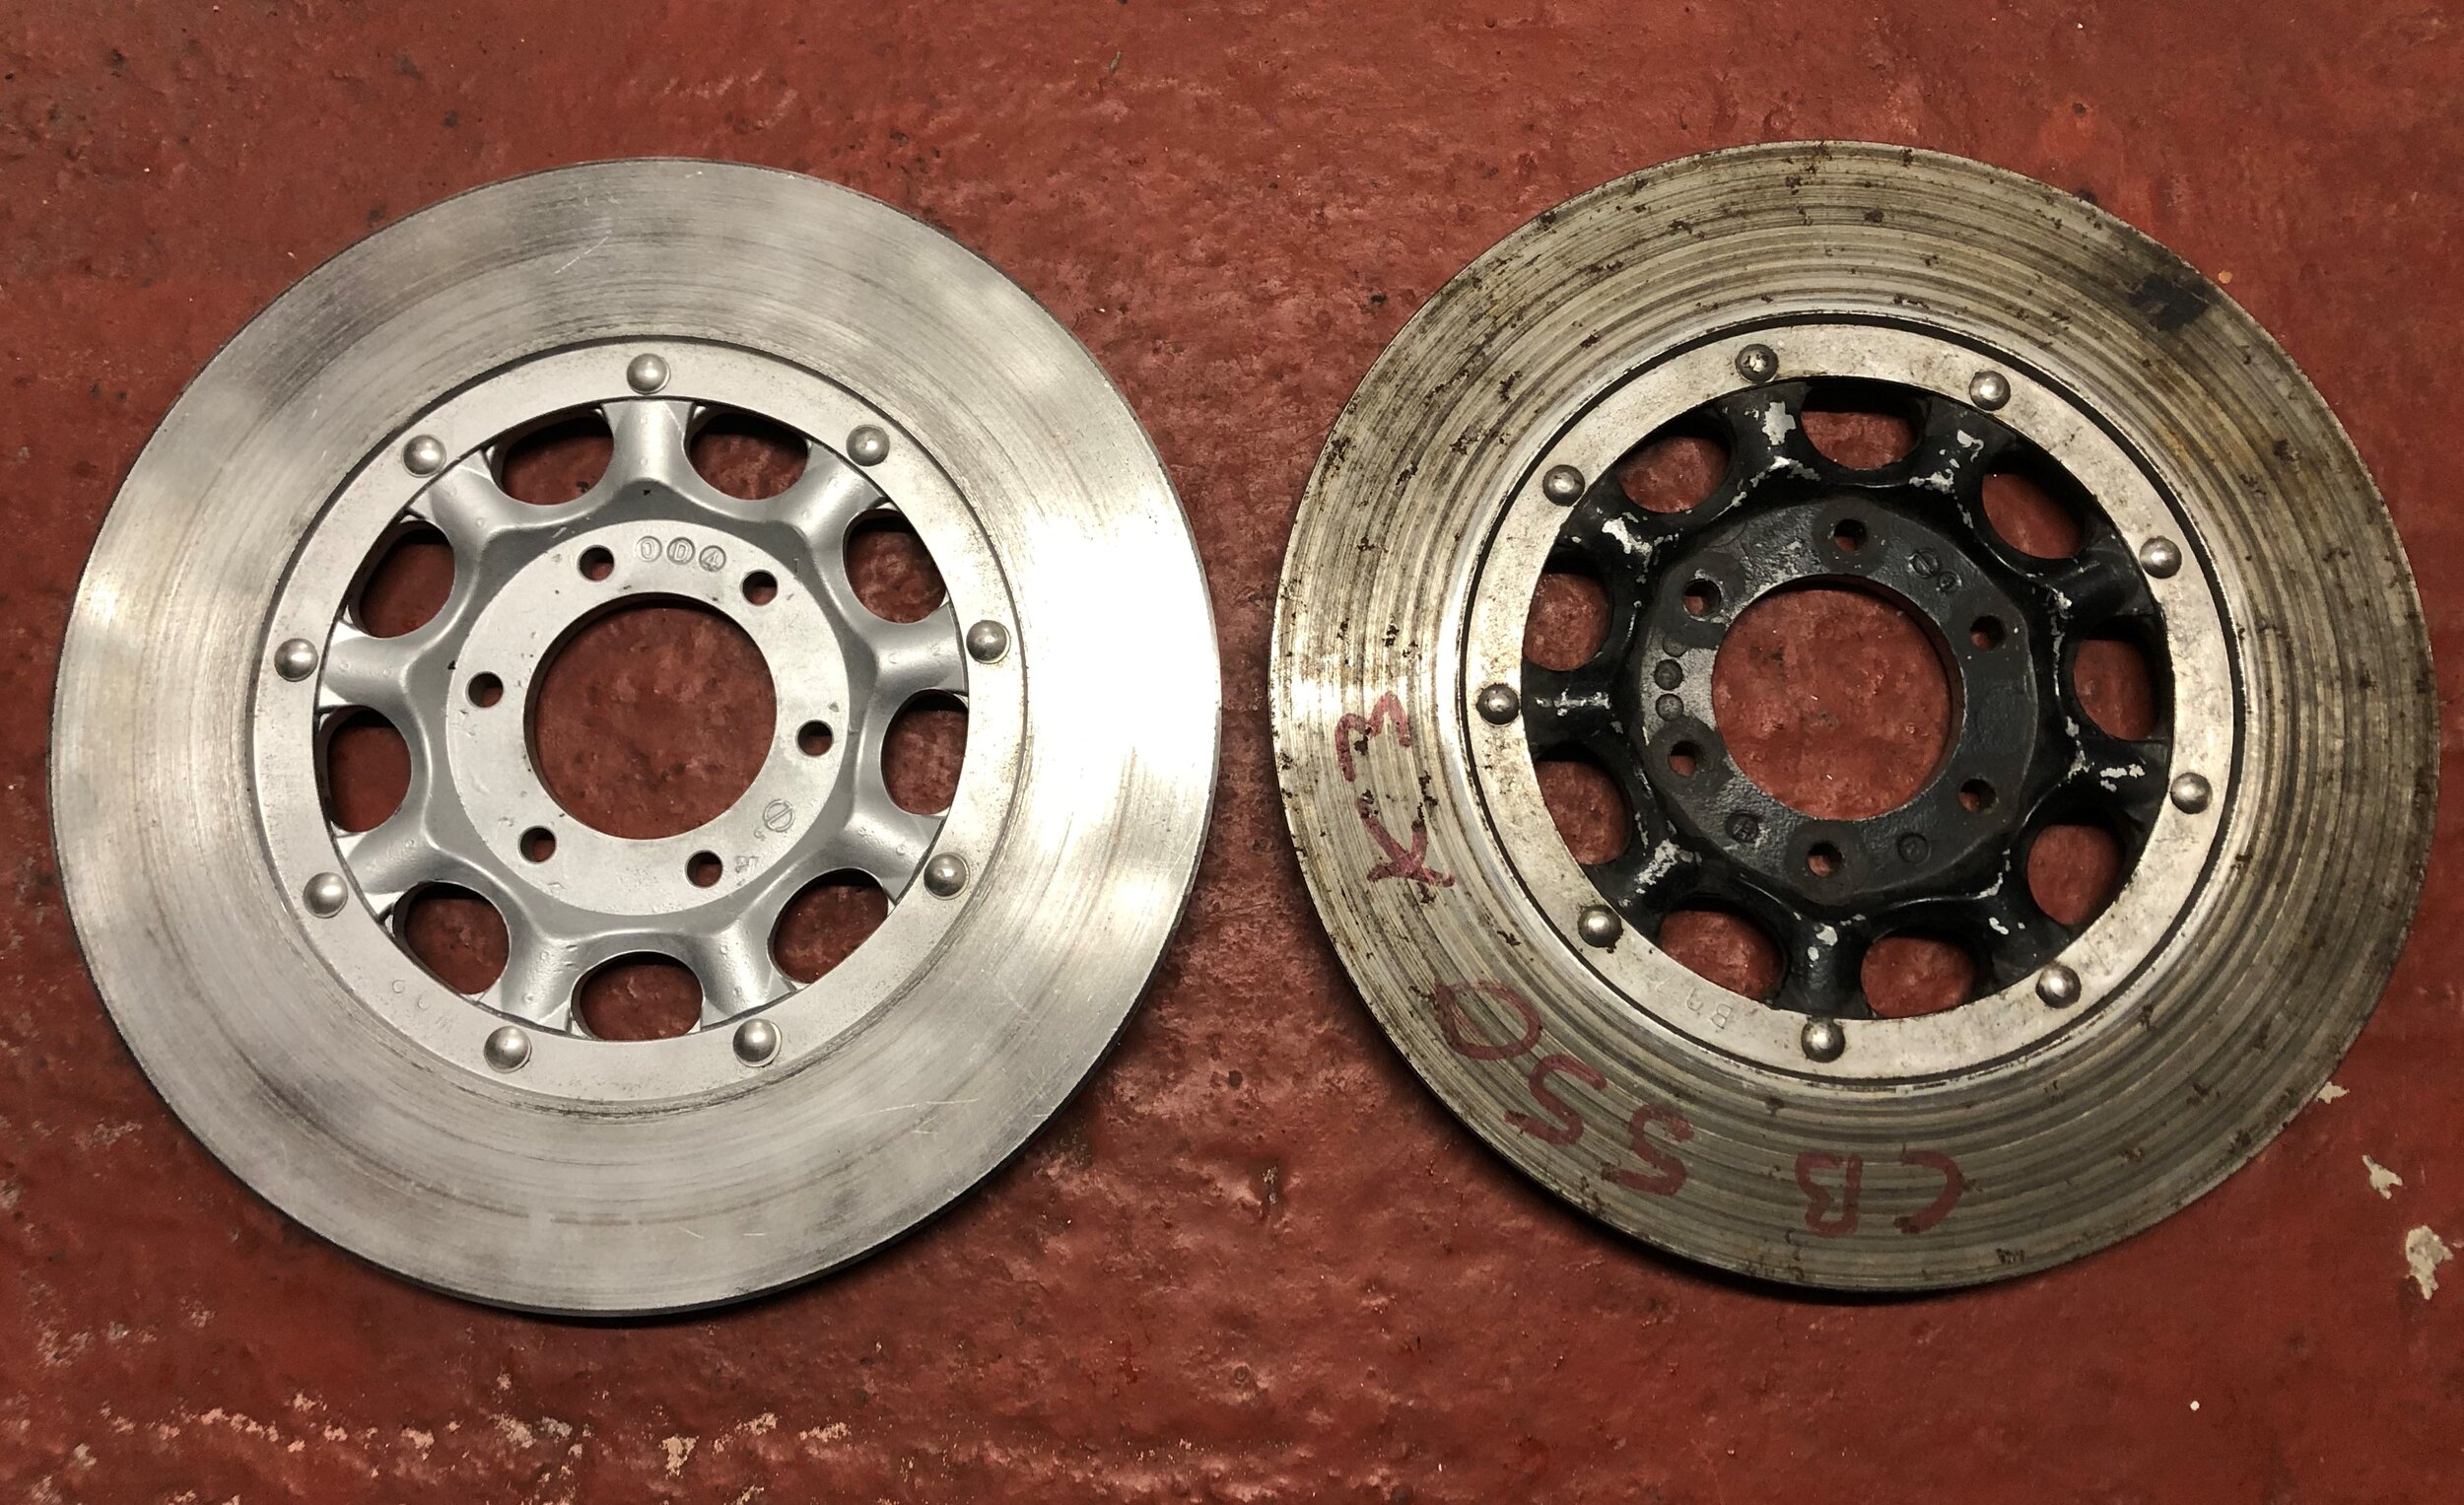
I also got two used brake discs on eBay, one for £25 and one for £30. New OEM discs cost £292 and aftermarket ones are £166. 4 into 1 do a hardened stainless, pre-drilled disc with a black aluminium centre for $150 (£115) per disc - that’s my preferred option but after you add import tax and shipping to the U.K. it get’s very expensive with a dual discs. You can get 2 used discs for £50-60 and drill them yourself for a few quid..


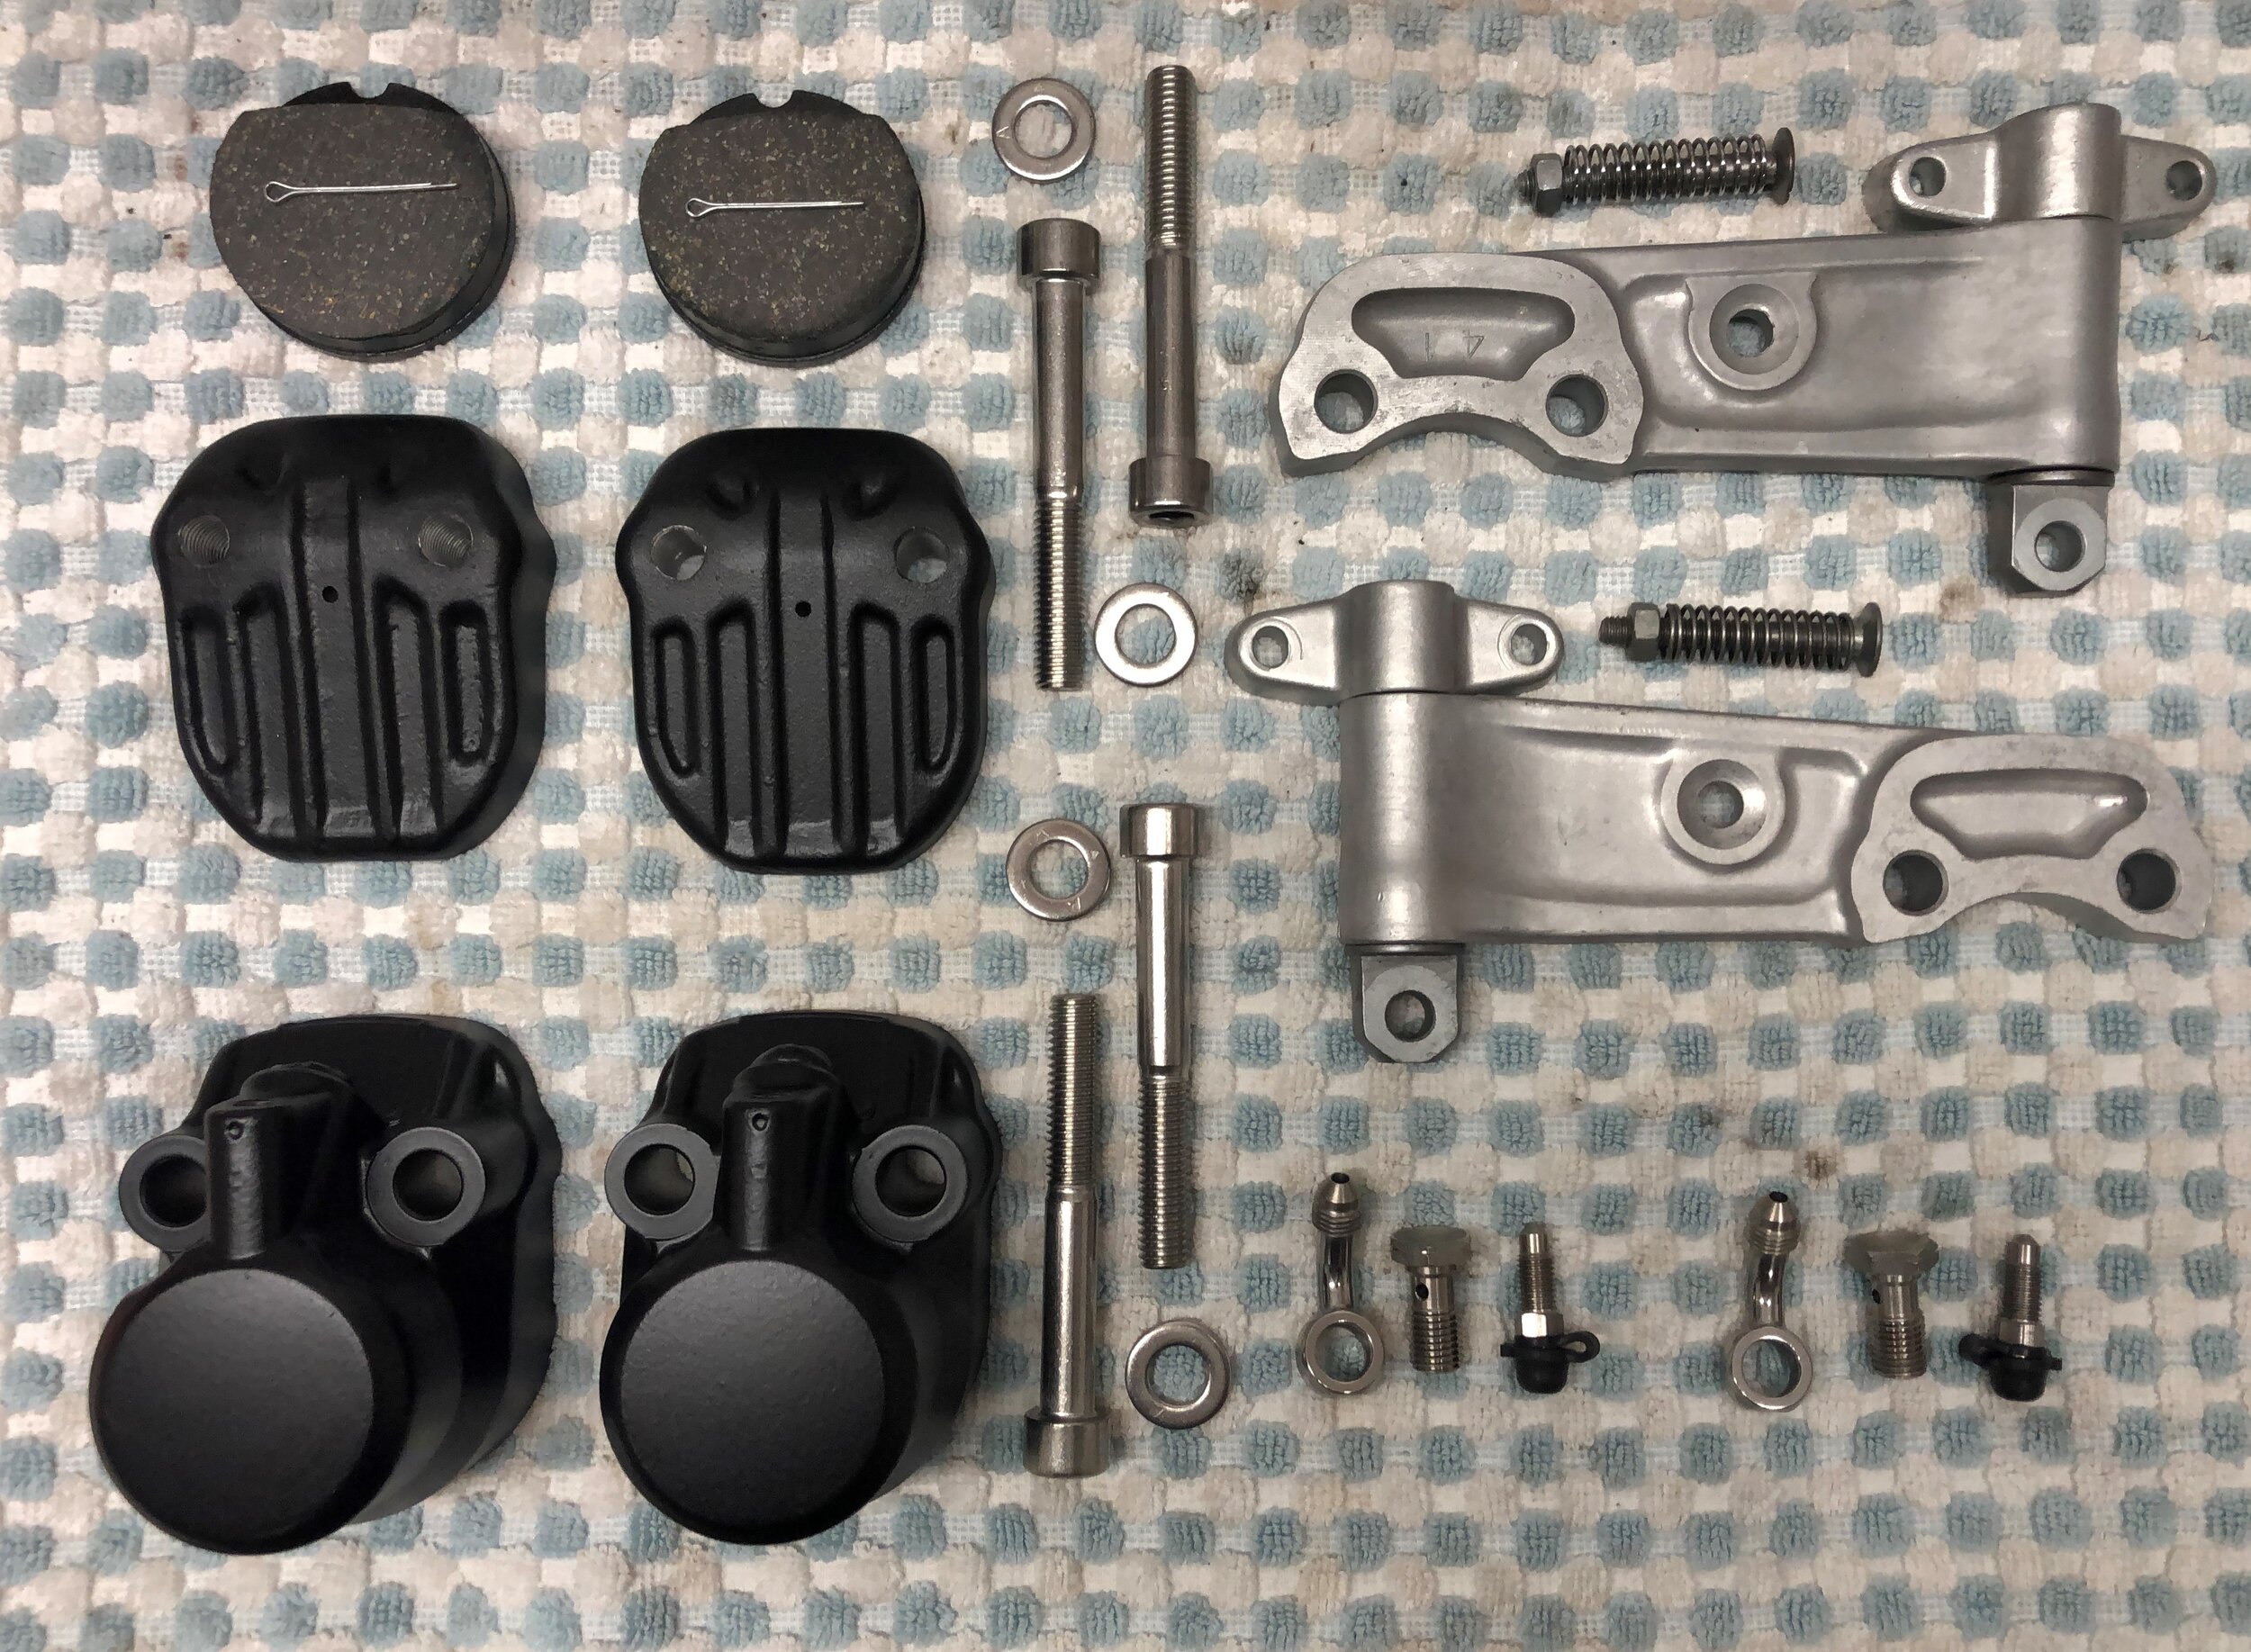
Stripping a CB500/CB550 caliper
Both calipers that I sourced needed a full strip, clean & rebuild. One was really tough to get an old pad out. It’s best to clamp the shell in a vise, heat up the casing, apply some fast release and use a chisel or screwdriver to whack them out. Remember to straighten the split pin legs first.


The hanger bracket T-fixing should rotate freely. One of mine was seized and took a lot of persuading in the vice. Always use a cloth to save the parts getting chewed up in the vice jaws.
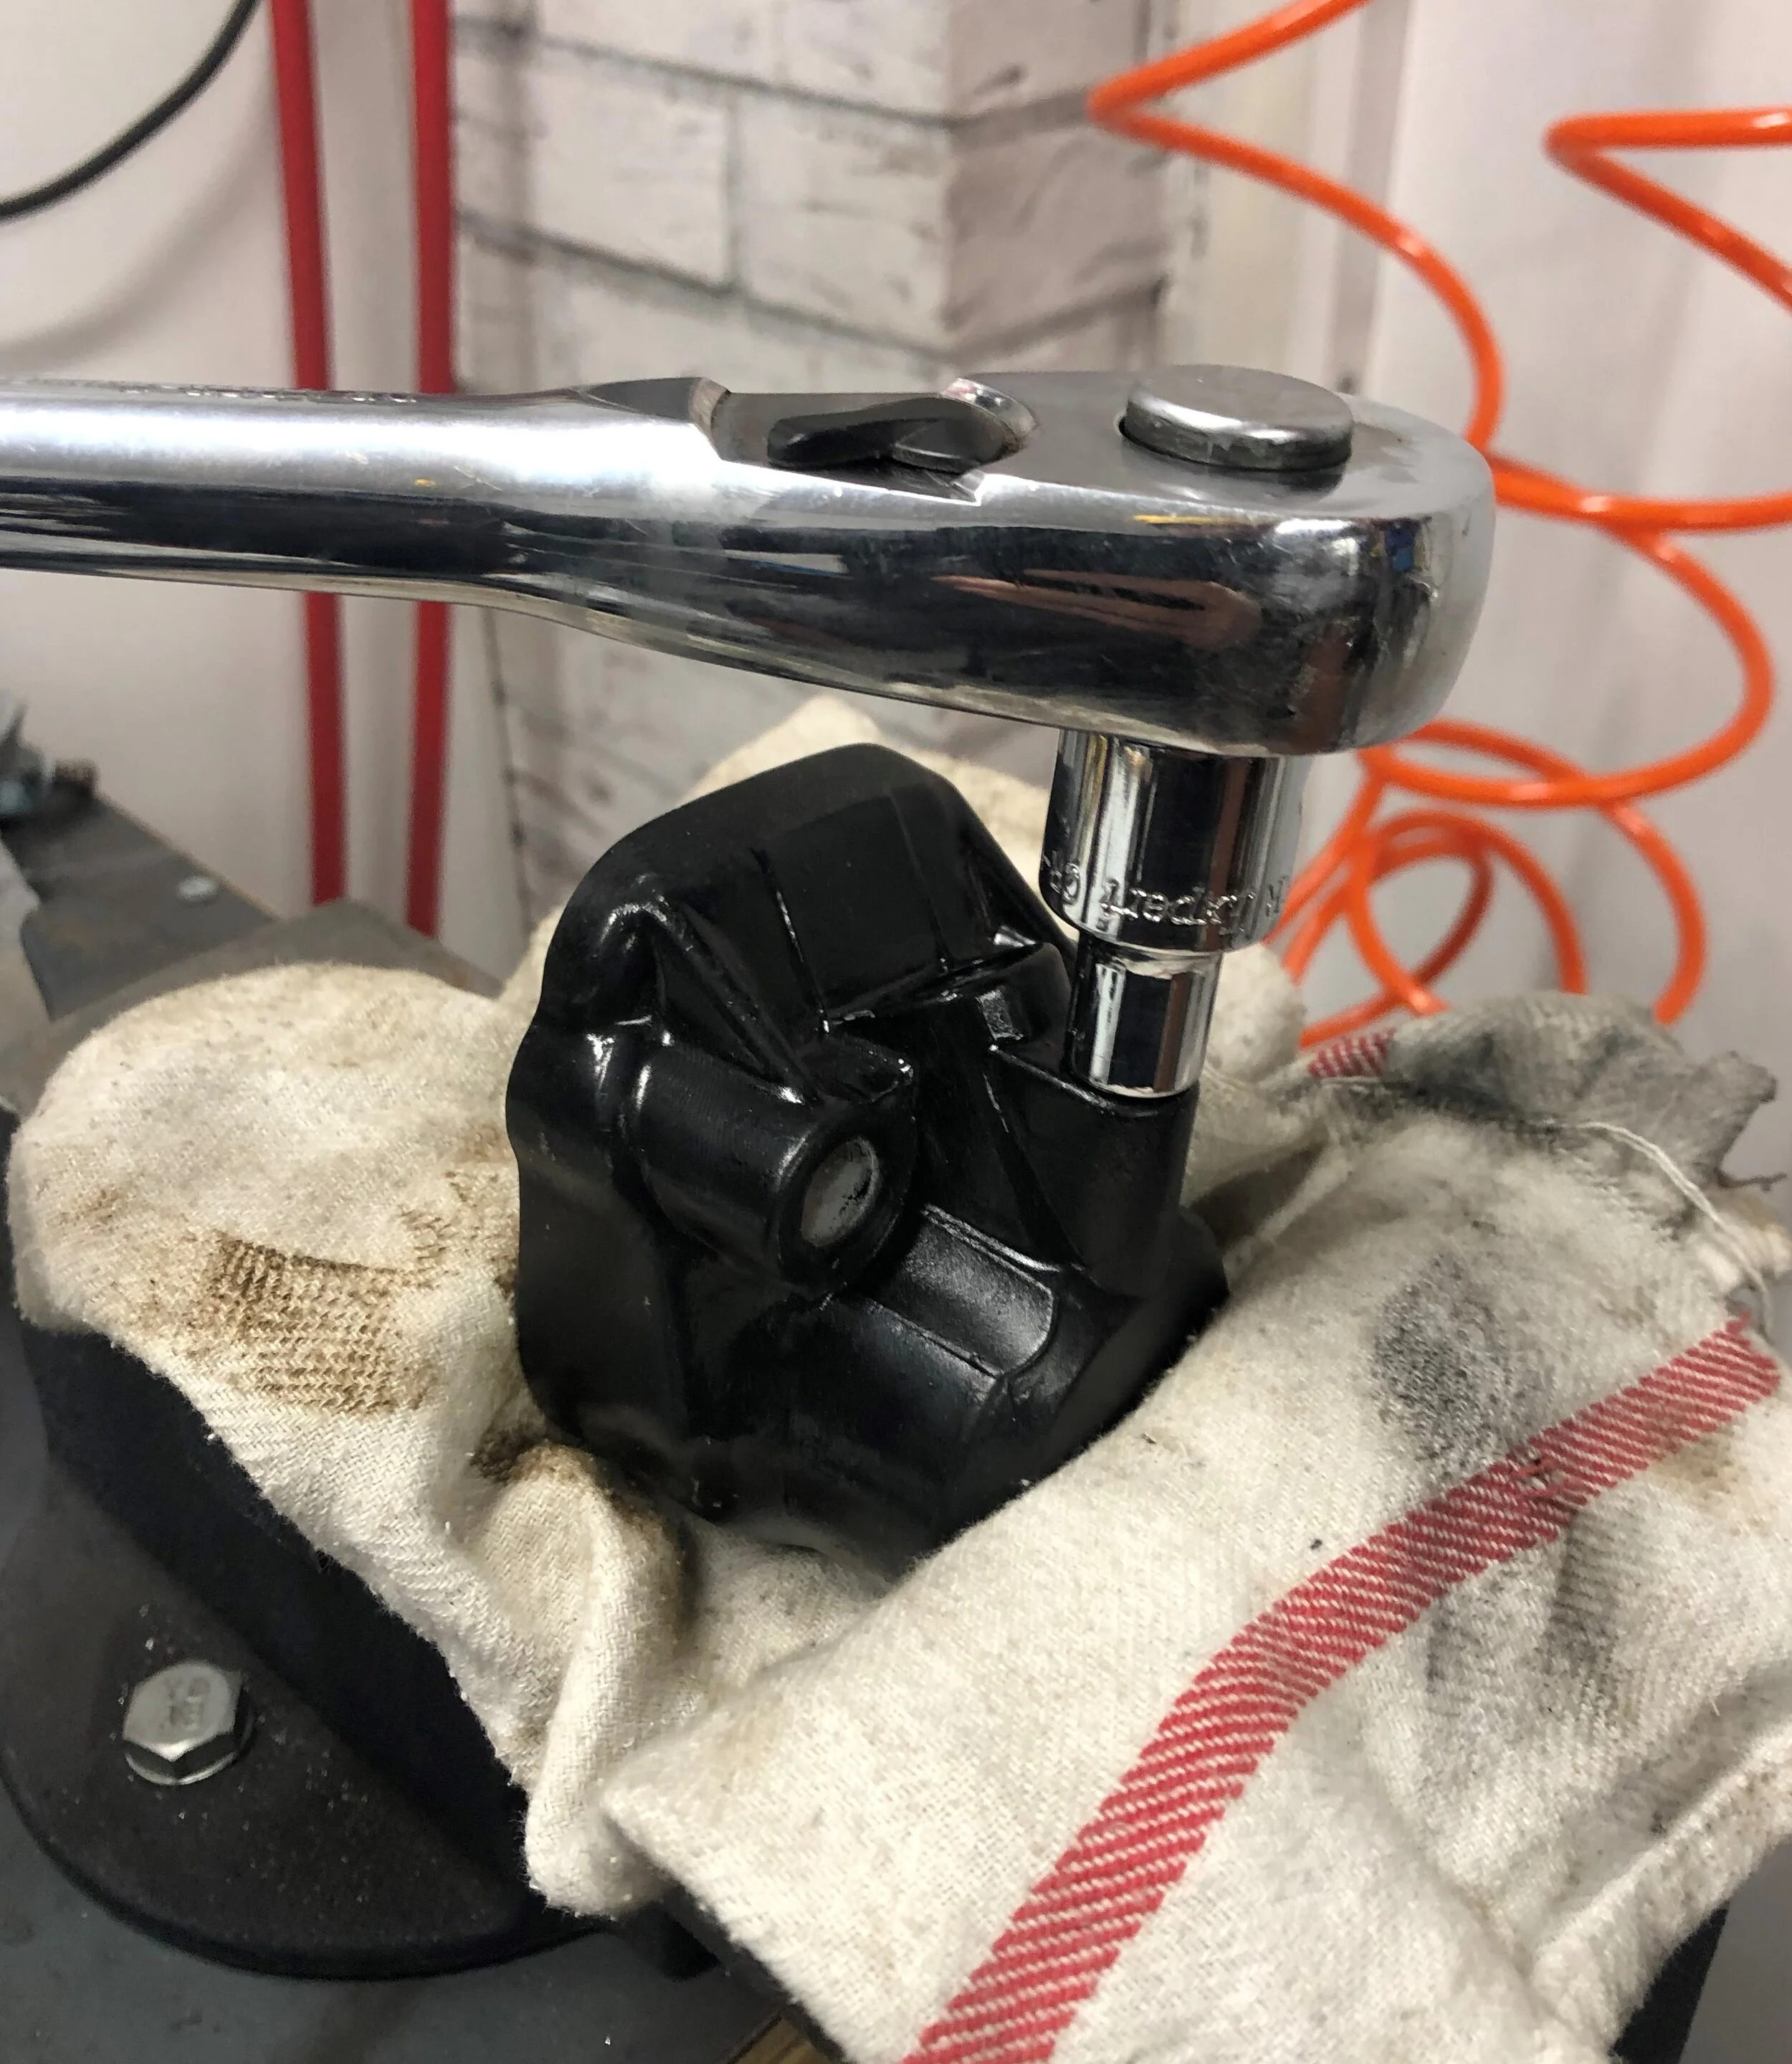
If the bleed nipple doesn’t turn with a small amount of force - don’t apply a lot of force or you could shear it off. Mine was super tight so I heated up the casing, used some fast release and a socket to get a solid grip on it. Thankfully It eventually came out - having one snap off would be a real headache.


I then blasted & cleaned all the parts except the main caliper body. I was still mulling my options for brake lines so didn’t have a master cylinder & lines set-up to push the pistons out with hydraulic force. I ended up buying a cheap, used Honda rear brake line from eBay and connected that to my CBR master cylinder (more info below) to push out the old pistons. They didn’t want to budge so after a bit of Googling I tried to hit the piston back in to loosen them. I also tried fast release and the heat gun. Annoyingly, I couldn’t get them to budge on either caliper.


Drilling CB550 brake discs (rotors) & removing rivets
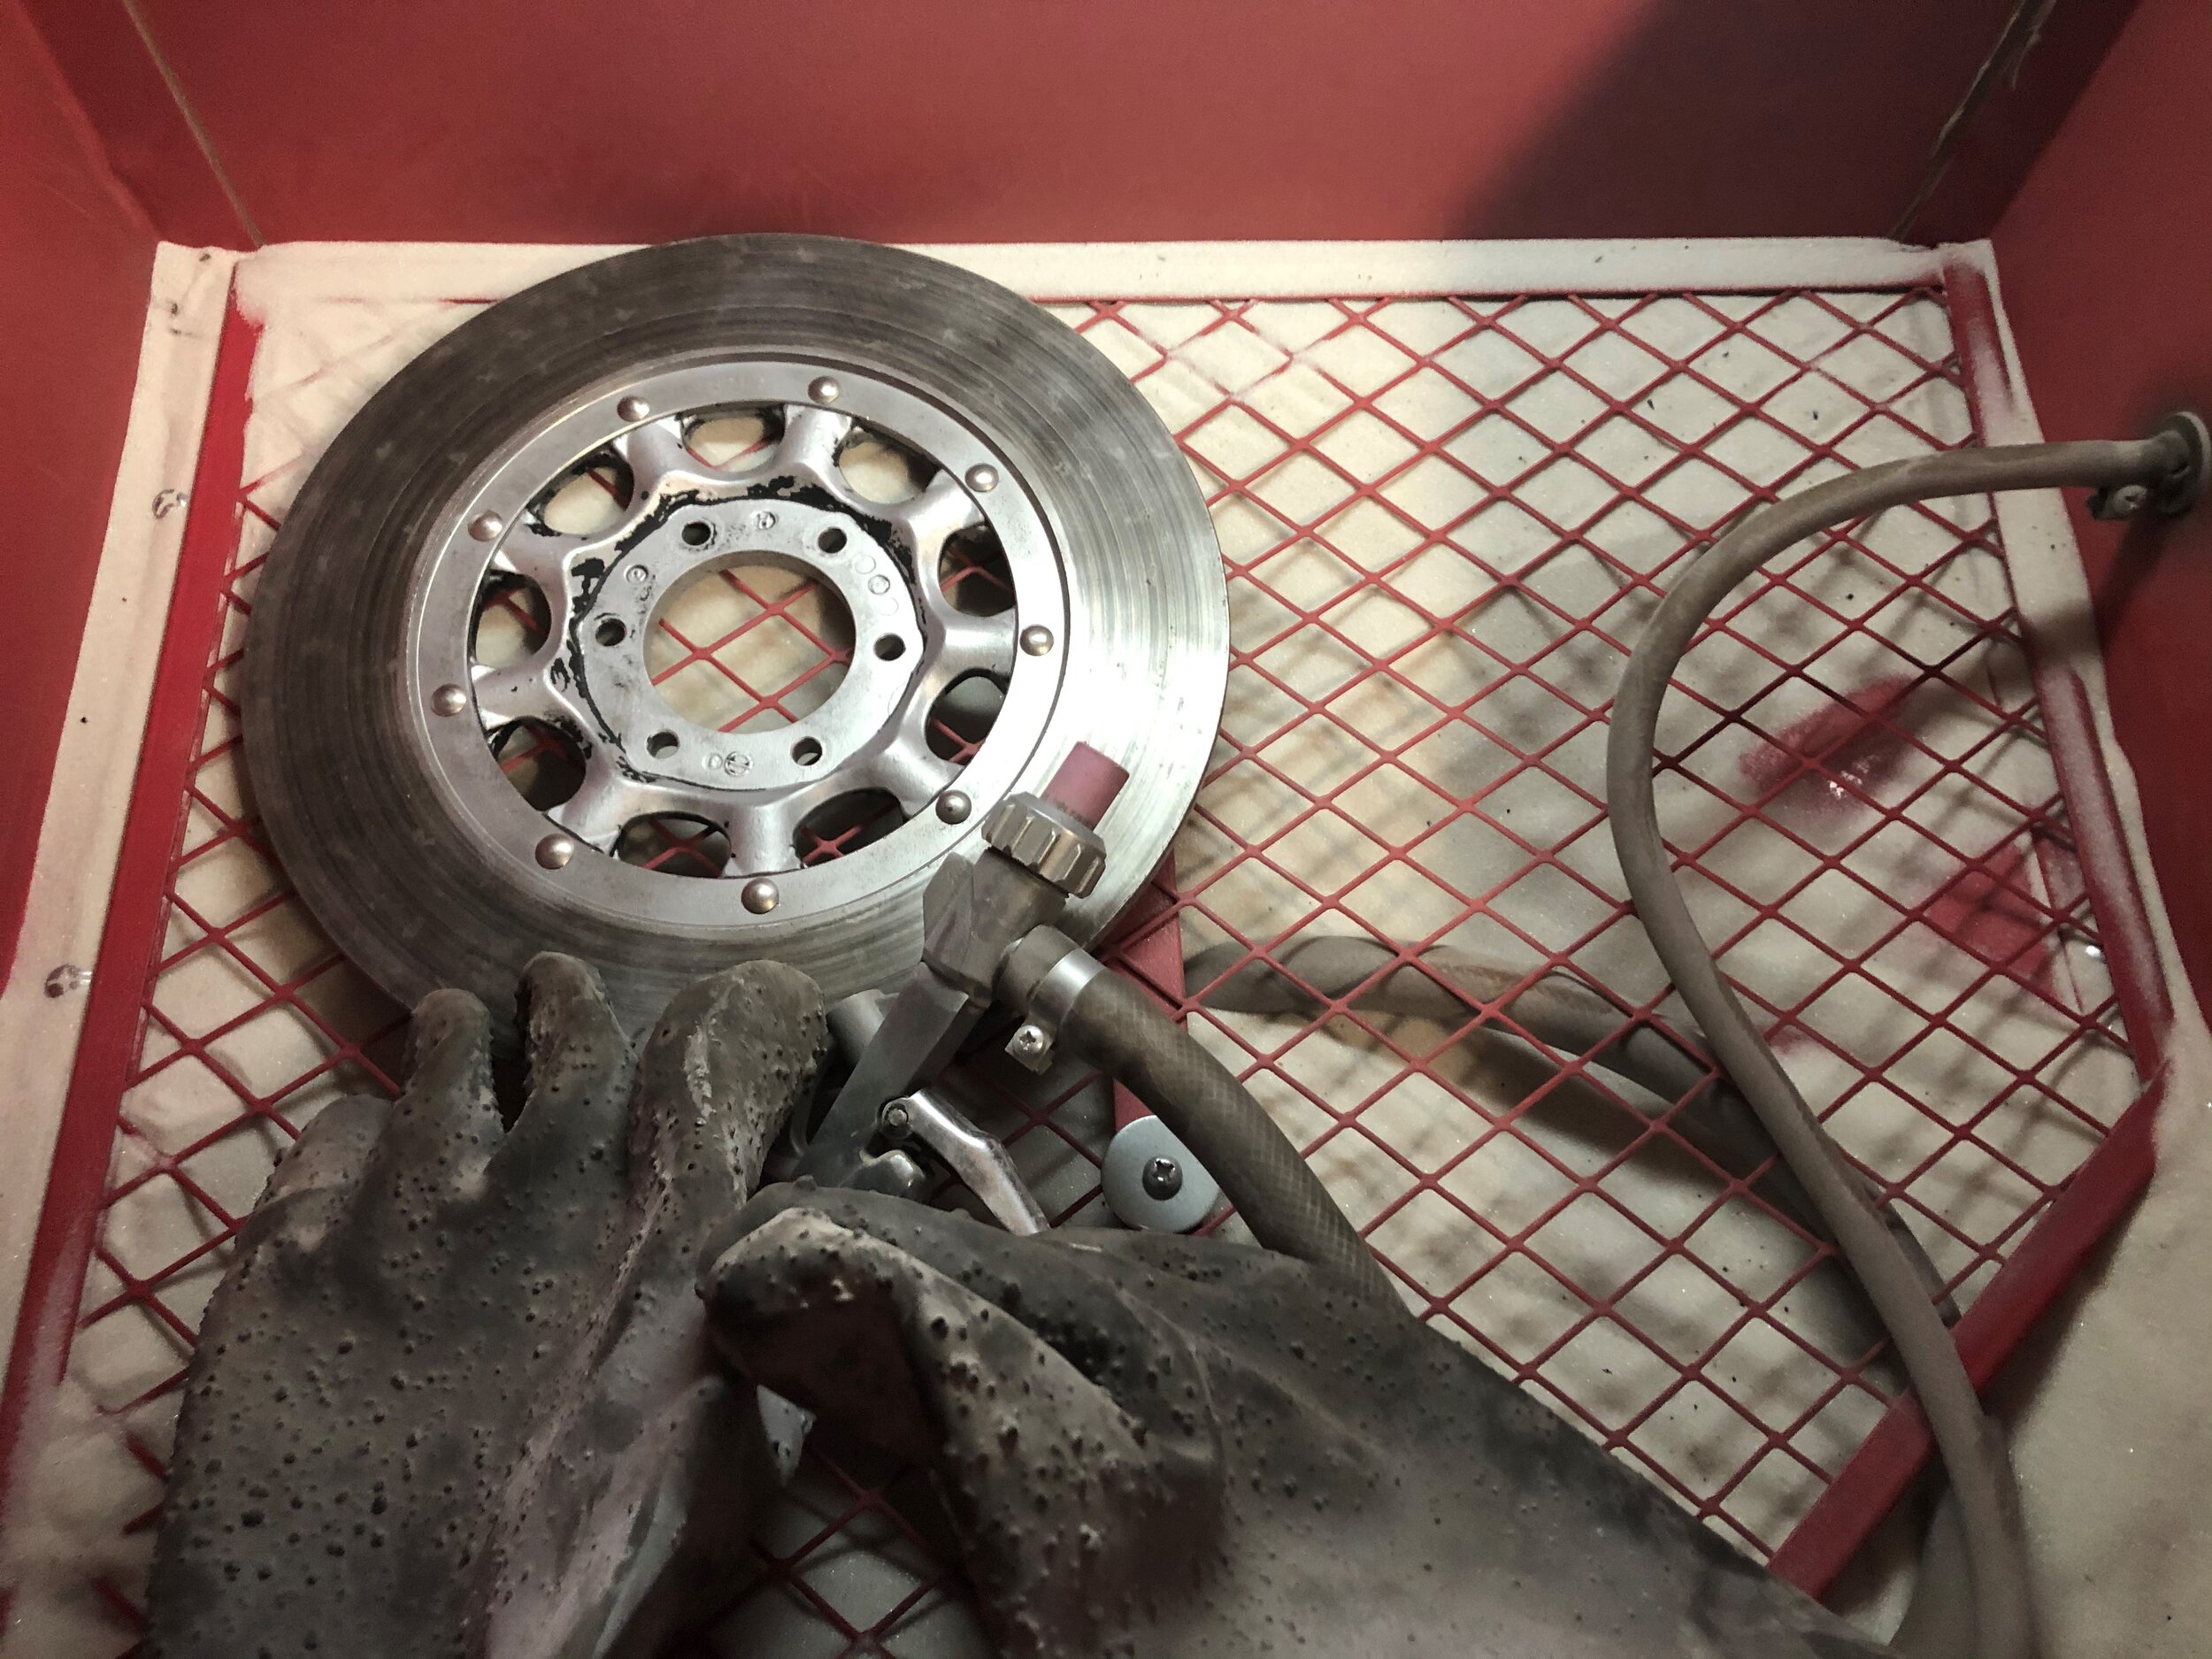
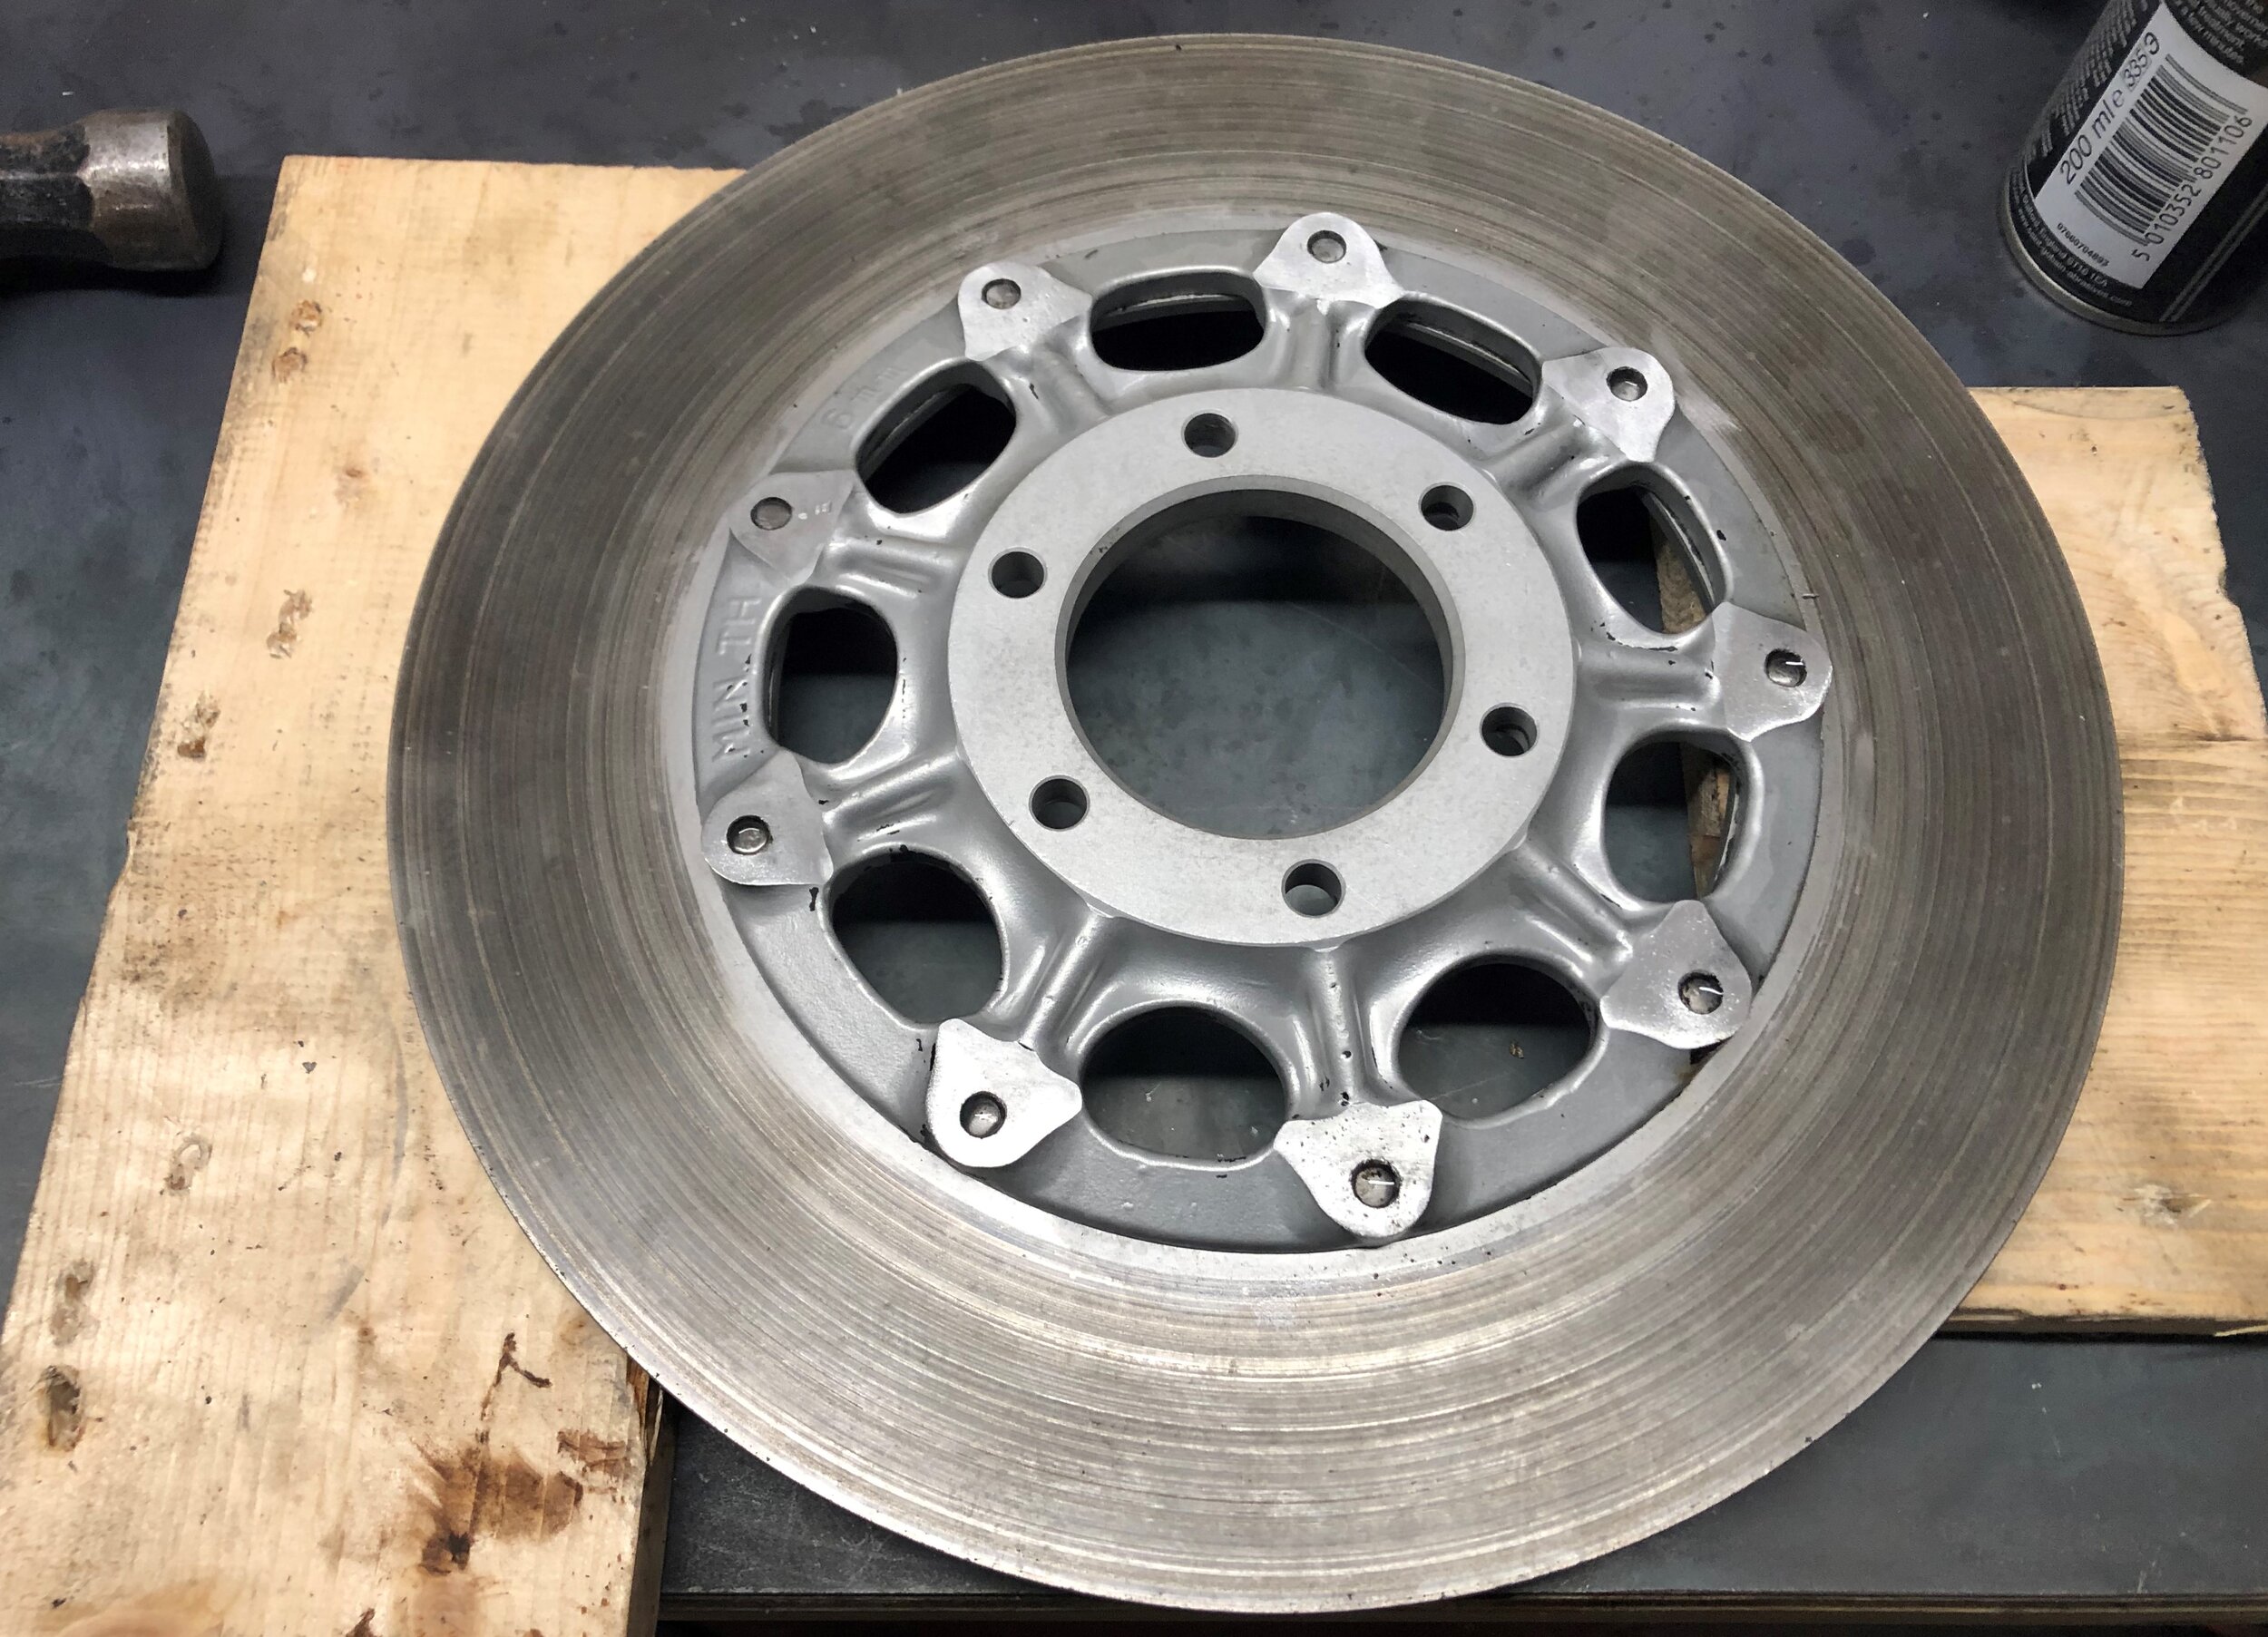
As with every modification from OEM spec, there seems to be debate about whether it’s a good idea or not. Personally I like the look of drilled discs and love a bit of weight saving (or so I thought - see below). Whether or not it helps in the rain or with cooling or whether having less surface area reduces braking, I feel more comfortable with drilled discs. I first cleaned them up by blasting them in the cabinet.

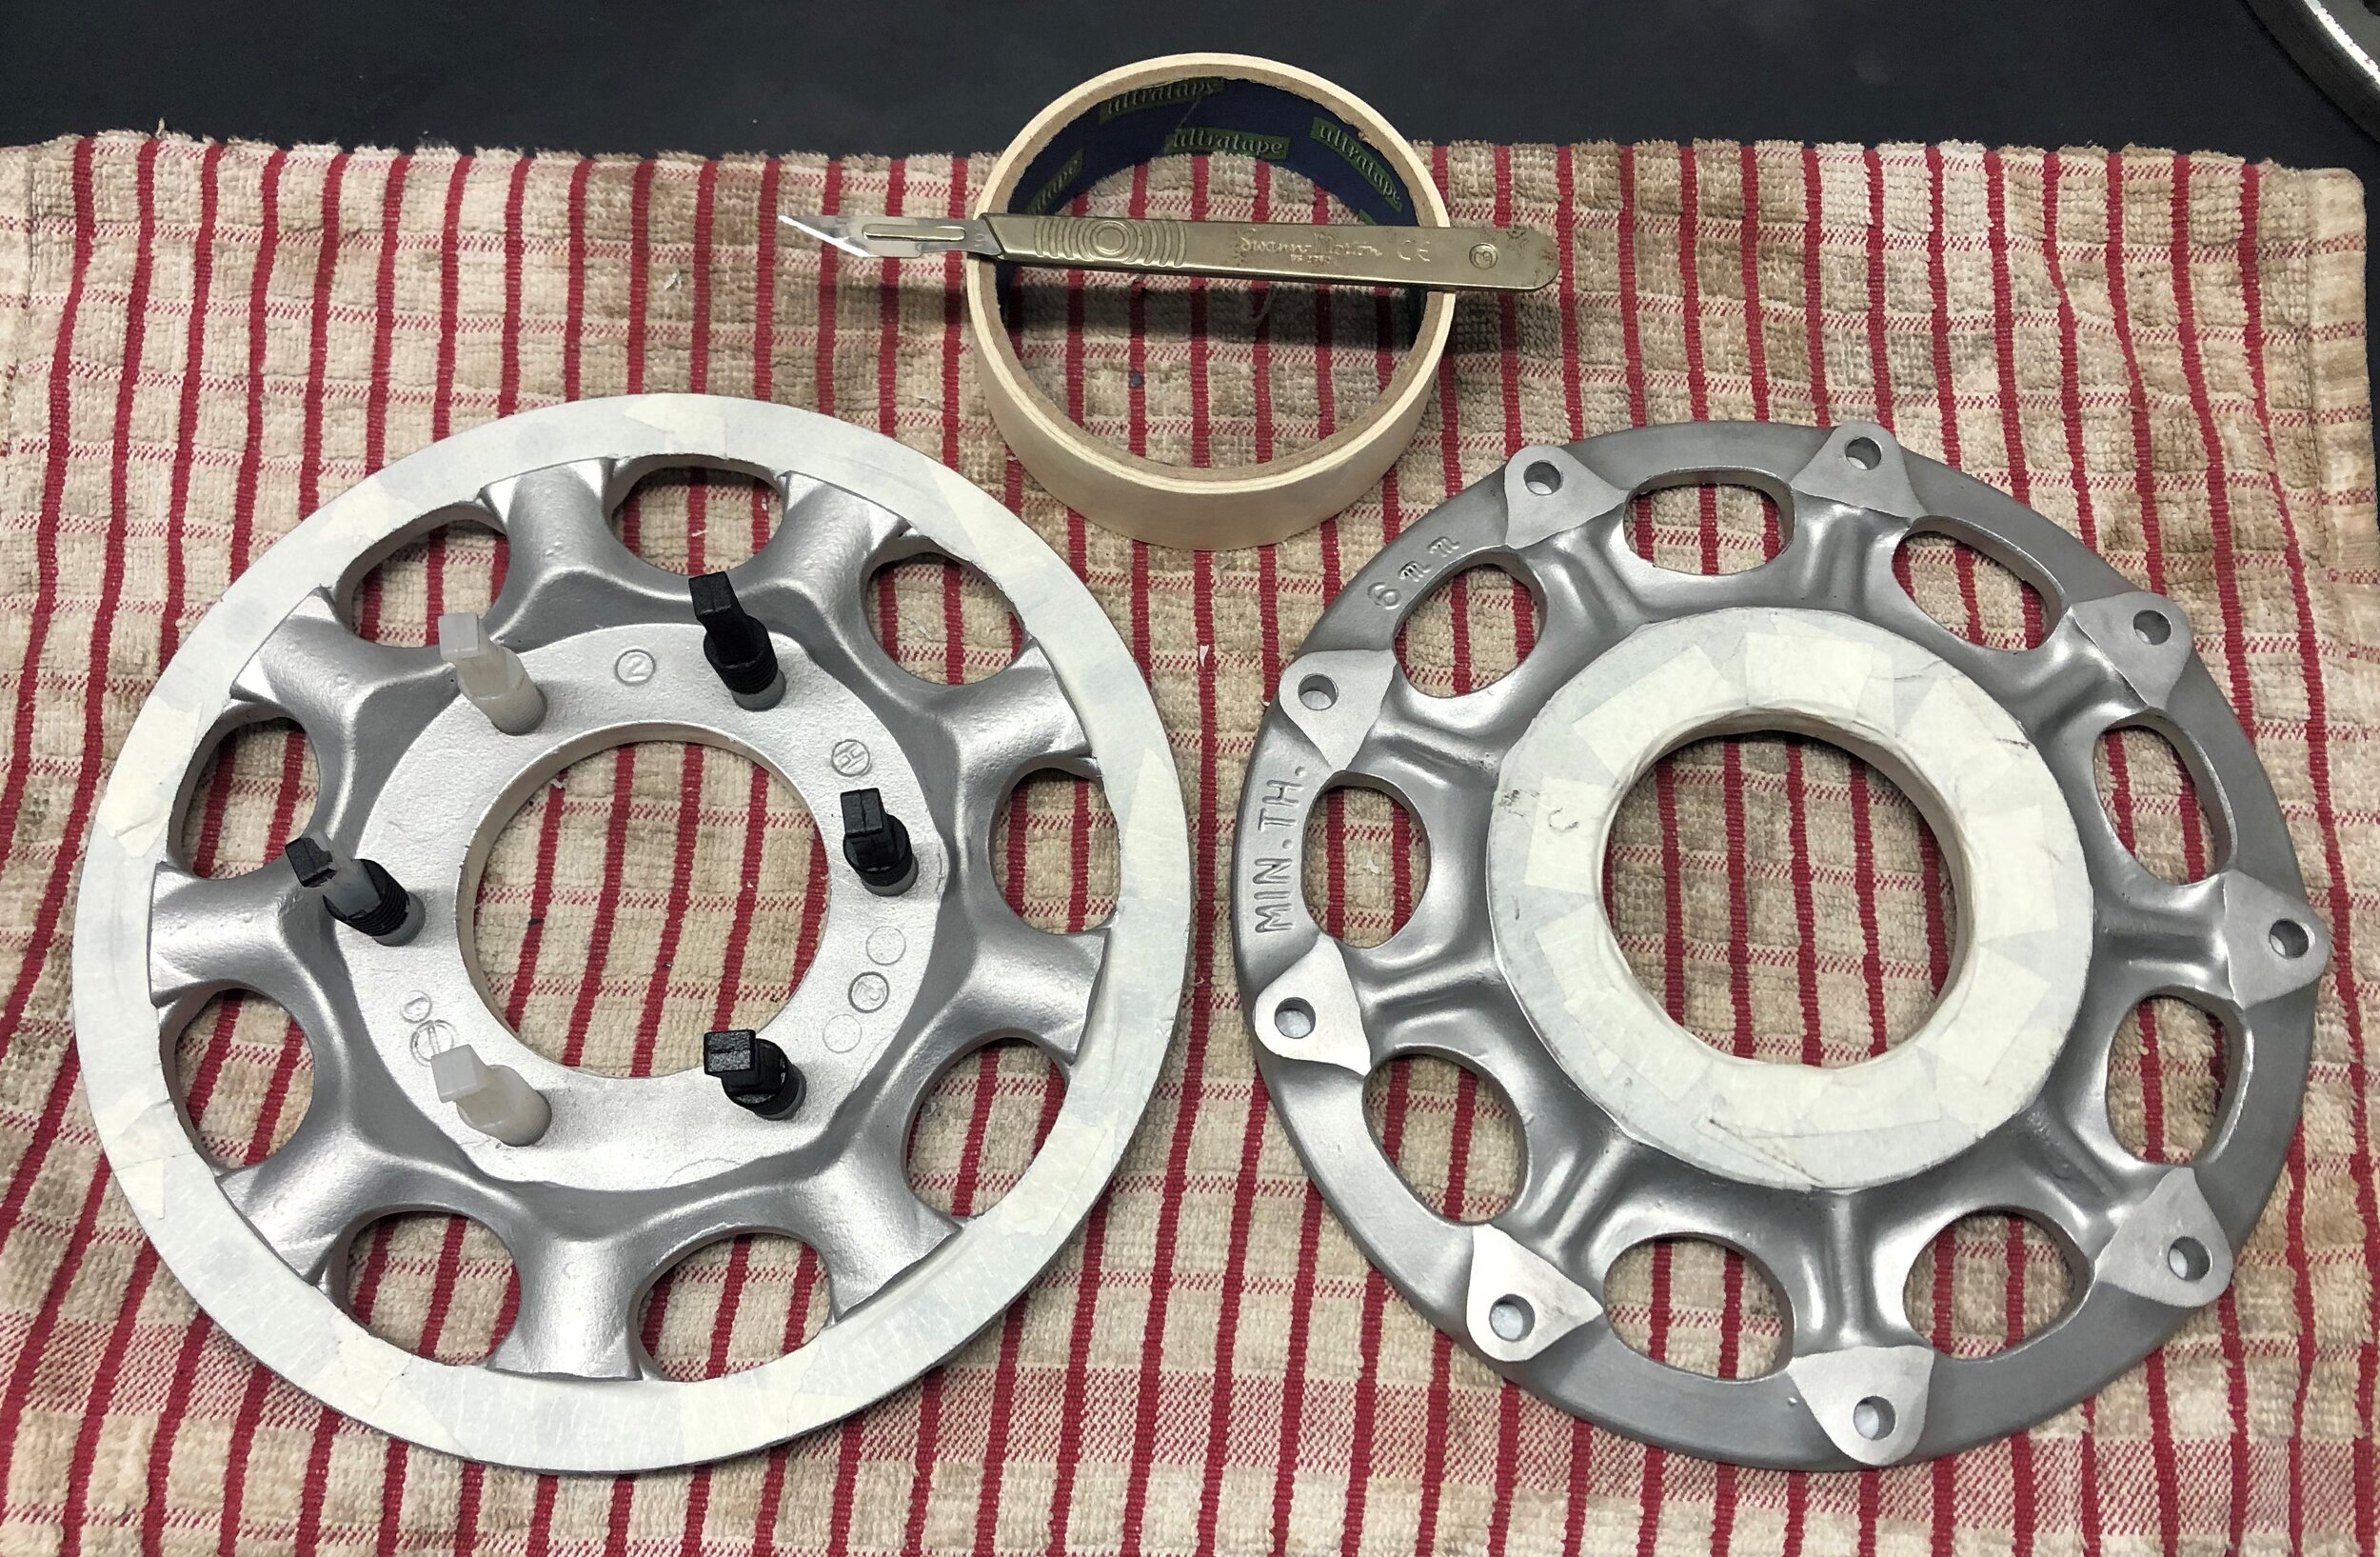
I saw a cool picture of a bike that had stainless bolts instead of rivets and after blasting and starting to drill I realising the discs were tricky to handle. It wasn’t part of the original plan but I decided to grind off the rivets to separate the centre from the actual brake disc. Doing this will make blasting, spraying, sanding, drilling etc much easier plus when I need to replace a disc in the future I’ll be able to keep the spray painted centre and just swap out the disc. I’ll probably buy a couple of spare 2nd hand discs and drill / prep them during this project for future swap out.
My first attempt was a mess, I tried to drill out the rivets but it ended up taking ages, wasting drill bits and causing some damage to the centre. The 2nd attempt went as smooth as a babies proverbial!


Lay the disc face down and grind off the rivet heads with a course sanding wheel so the M6 rivet shaft is exposed. This is the back of the disc so no need to be super careful but the neater the better. I’ll be spraying the centre flange anyway.
Tap each rivet shaft with a 5-6mm punch so they depress 1mm or so. Use a little heat if they’re tough to shift.
Move the disc onto some wooden blocks so the rivets have space to come out. Add some penetrating fluid & heat (if needed) and tap out each rivet with a punch narrow enough to go straight through the hole. I used a 3mm one.
Tap out the aluminium centre with a rubber mallet so as not to damage it and make sure it lands somewhere soft.
Really easy when you know how. Separating them also makes life a lot easier for refurbishing the disc. I’ll explain later on how I bolted them back together.
I found a good twin conversion article with a PDF drill pattern included (download). I just printed out two to make a full circle, cut round the pattern and taped them to the disc. I pretty much followed the same process on the article apart from using CT-90 fluid. I used a good quality auto punch for marking the hole pattern on the disc. The article says 1/2 inch holes (6.35mm) but I had a few 4.8mm cobalt drill bits lying around so decided to use them. After a few holes it was obvious that they were too small so I bought some 6mm cobalt bits.
I then used a cobalt counter sink bit on both sides to de-burr. To finish off, I used a rotary sander with a heavy grit pad to remove any remaining burrs, de-glaze and clean up. They look really good and, apparently sanding helps with brake squeal.


A little tip, don’t use any fluid to get the hole started as you can’t see if you’re centred on the punch mark. Once the drill bit bites in, spray some fluid and keep adding 3 or 4 times per hole. Don’t apply too much force, let the bit & drill weight do most of the work.
A word of warning when drilling for a prolonged period - don’t get lazy! Keep safety in mind and shut off the drill when moving the disc, clearing swarf etc. I didn’t and caught my glove in the drill resulting in a trip to A&E with a broken and pretty mangled finger. I was pretty lucky, it could have been worse but it did pause the build for a few months.
As I mentioned, I like a bit of weight saving. So, how many grams does hours of graft drilling and countersinking 54 x 6mm holes save? Around 100g - not even 5%!


Spray parts
Back to the old spray booth again for the calipers and disc centres. I did some spray booth upgrades to make spraying faster and easier. I’ll post a blog about spraying soon.


Brake caliper new parts & Goodridge brake lines
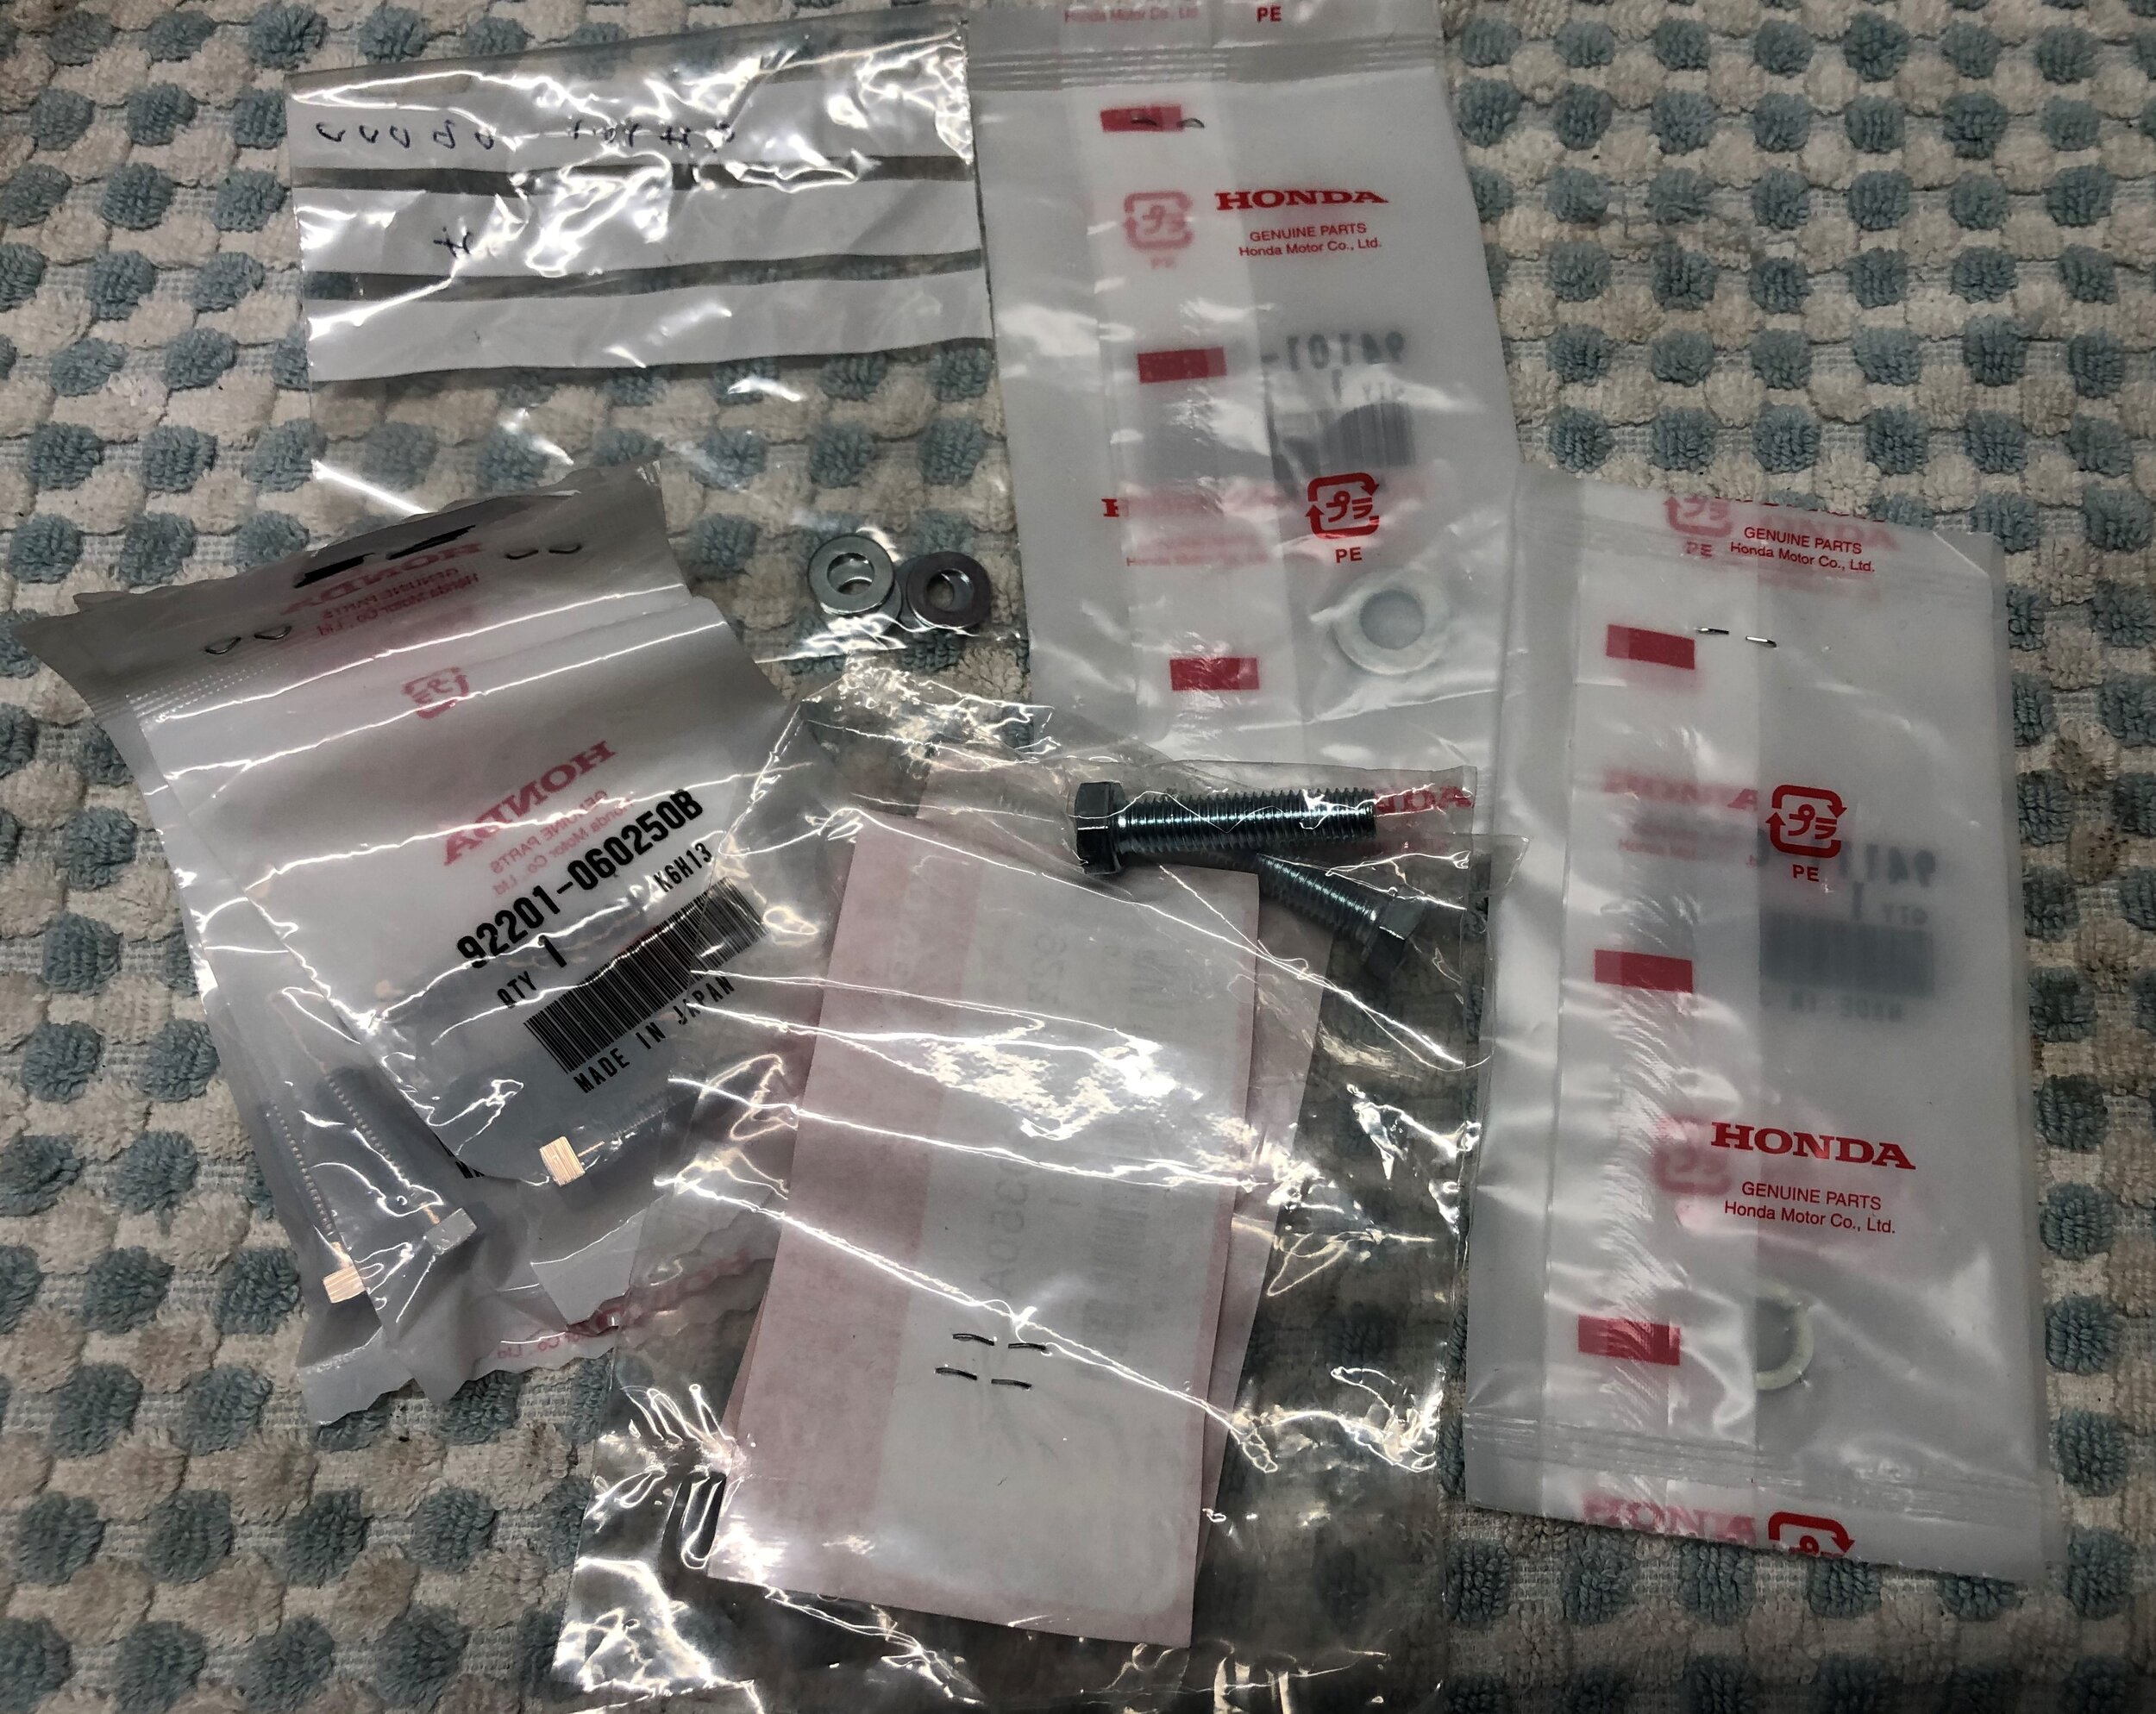
As usual, the OEM parts bill was more than expected. The 2nd hand calipers didn’t come with all the fixing bolts and I didn’t want to take any risks with non-OEM bolts on such a safety critical item.
Because I couldn’t get the pistons out, I got new caliper main bodies, pistons & seals from David Silver Spares. That set me back £153 and I still had to spray them as the black didn’t match my other parts.
I got new EBC brake pads (FA013) and went with the softer organic ones as the discs are expensive and it takes a fair bit of graft to drill them. I’d rather the pads wear out than the discs as they're cheap and easy to swap out. Personally, I prefer the bite of semi-sintered pads but something has to wear and, in this set-up, I’d rather it be the pad.


I decided to go with custom Goodridge stainless braided brake lines. To keep things simple I went with a double banjo at the master cylinder and ran a line direct to each caliper. There’s two routes to go with custom Goodridge lines:
600 series where you cut, flare and assemble yourself.
Buildaline where you just screw things together.
I wanted to go the 600 series route as they looked cleaner but to get 2 lines with stainless fixings at around 500mm each is about £180 - way too much. Using zinc plated mild steel fittings is relatively palatable at £90ish but they don’t look so good and I prefer stainless.
Buildaline fixings and lines are all stainless steel and the whole lot came to around £80 helped by a few ebay bargains. The stainless braid on these hoses has a clear plastic coating to keep out dirt etc so I reckon that’s the way to go. I’m not sure why there’s such a cost difference between the two types.
Here’s the Goodridge parts I used:
1 x M10 x 1.25mm stainless double banjo bolt (came with 3 x copper crush washers)
2 x silver p-clips
6 x aluminium crush washers - 10mm ID, 14mm OD, 1mm thick (eBay)
To do: I’ll get 2 x stainless braided buildaline hose when I re-build the bike so I get the length correct.
Re-assembling the calipers & discs
The first job I tackled was rebuilding the calipers. The swivel pin on the arms have two o-rings that I cleaned & lubed with silicone spray. I put a little grease on the shaft. The new piston seals came pre-lubed with brake fluid, they went in really easily. To get the caliper pistons in I lubed them with some brake fluid and they pushed in with a little force. The EBC brake pads have a plastic spacer ring. I used some superglue to hold them in place so they didn’t become unseated. I also used a light smear of copper grease around the walls where the pad sits.
The pads for the smaller shell has a bump so it doesn’t seem to seat correctly. I suspect this is to allow the pad to sit flush with the disc due to the swivel caliper design. I used a split pin to hold these pads in place.


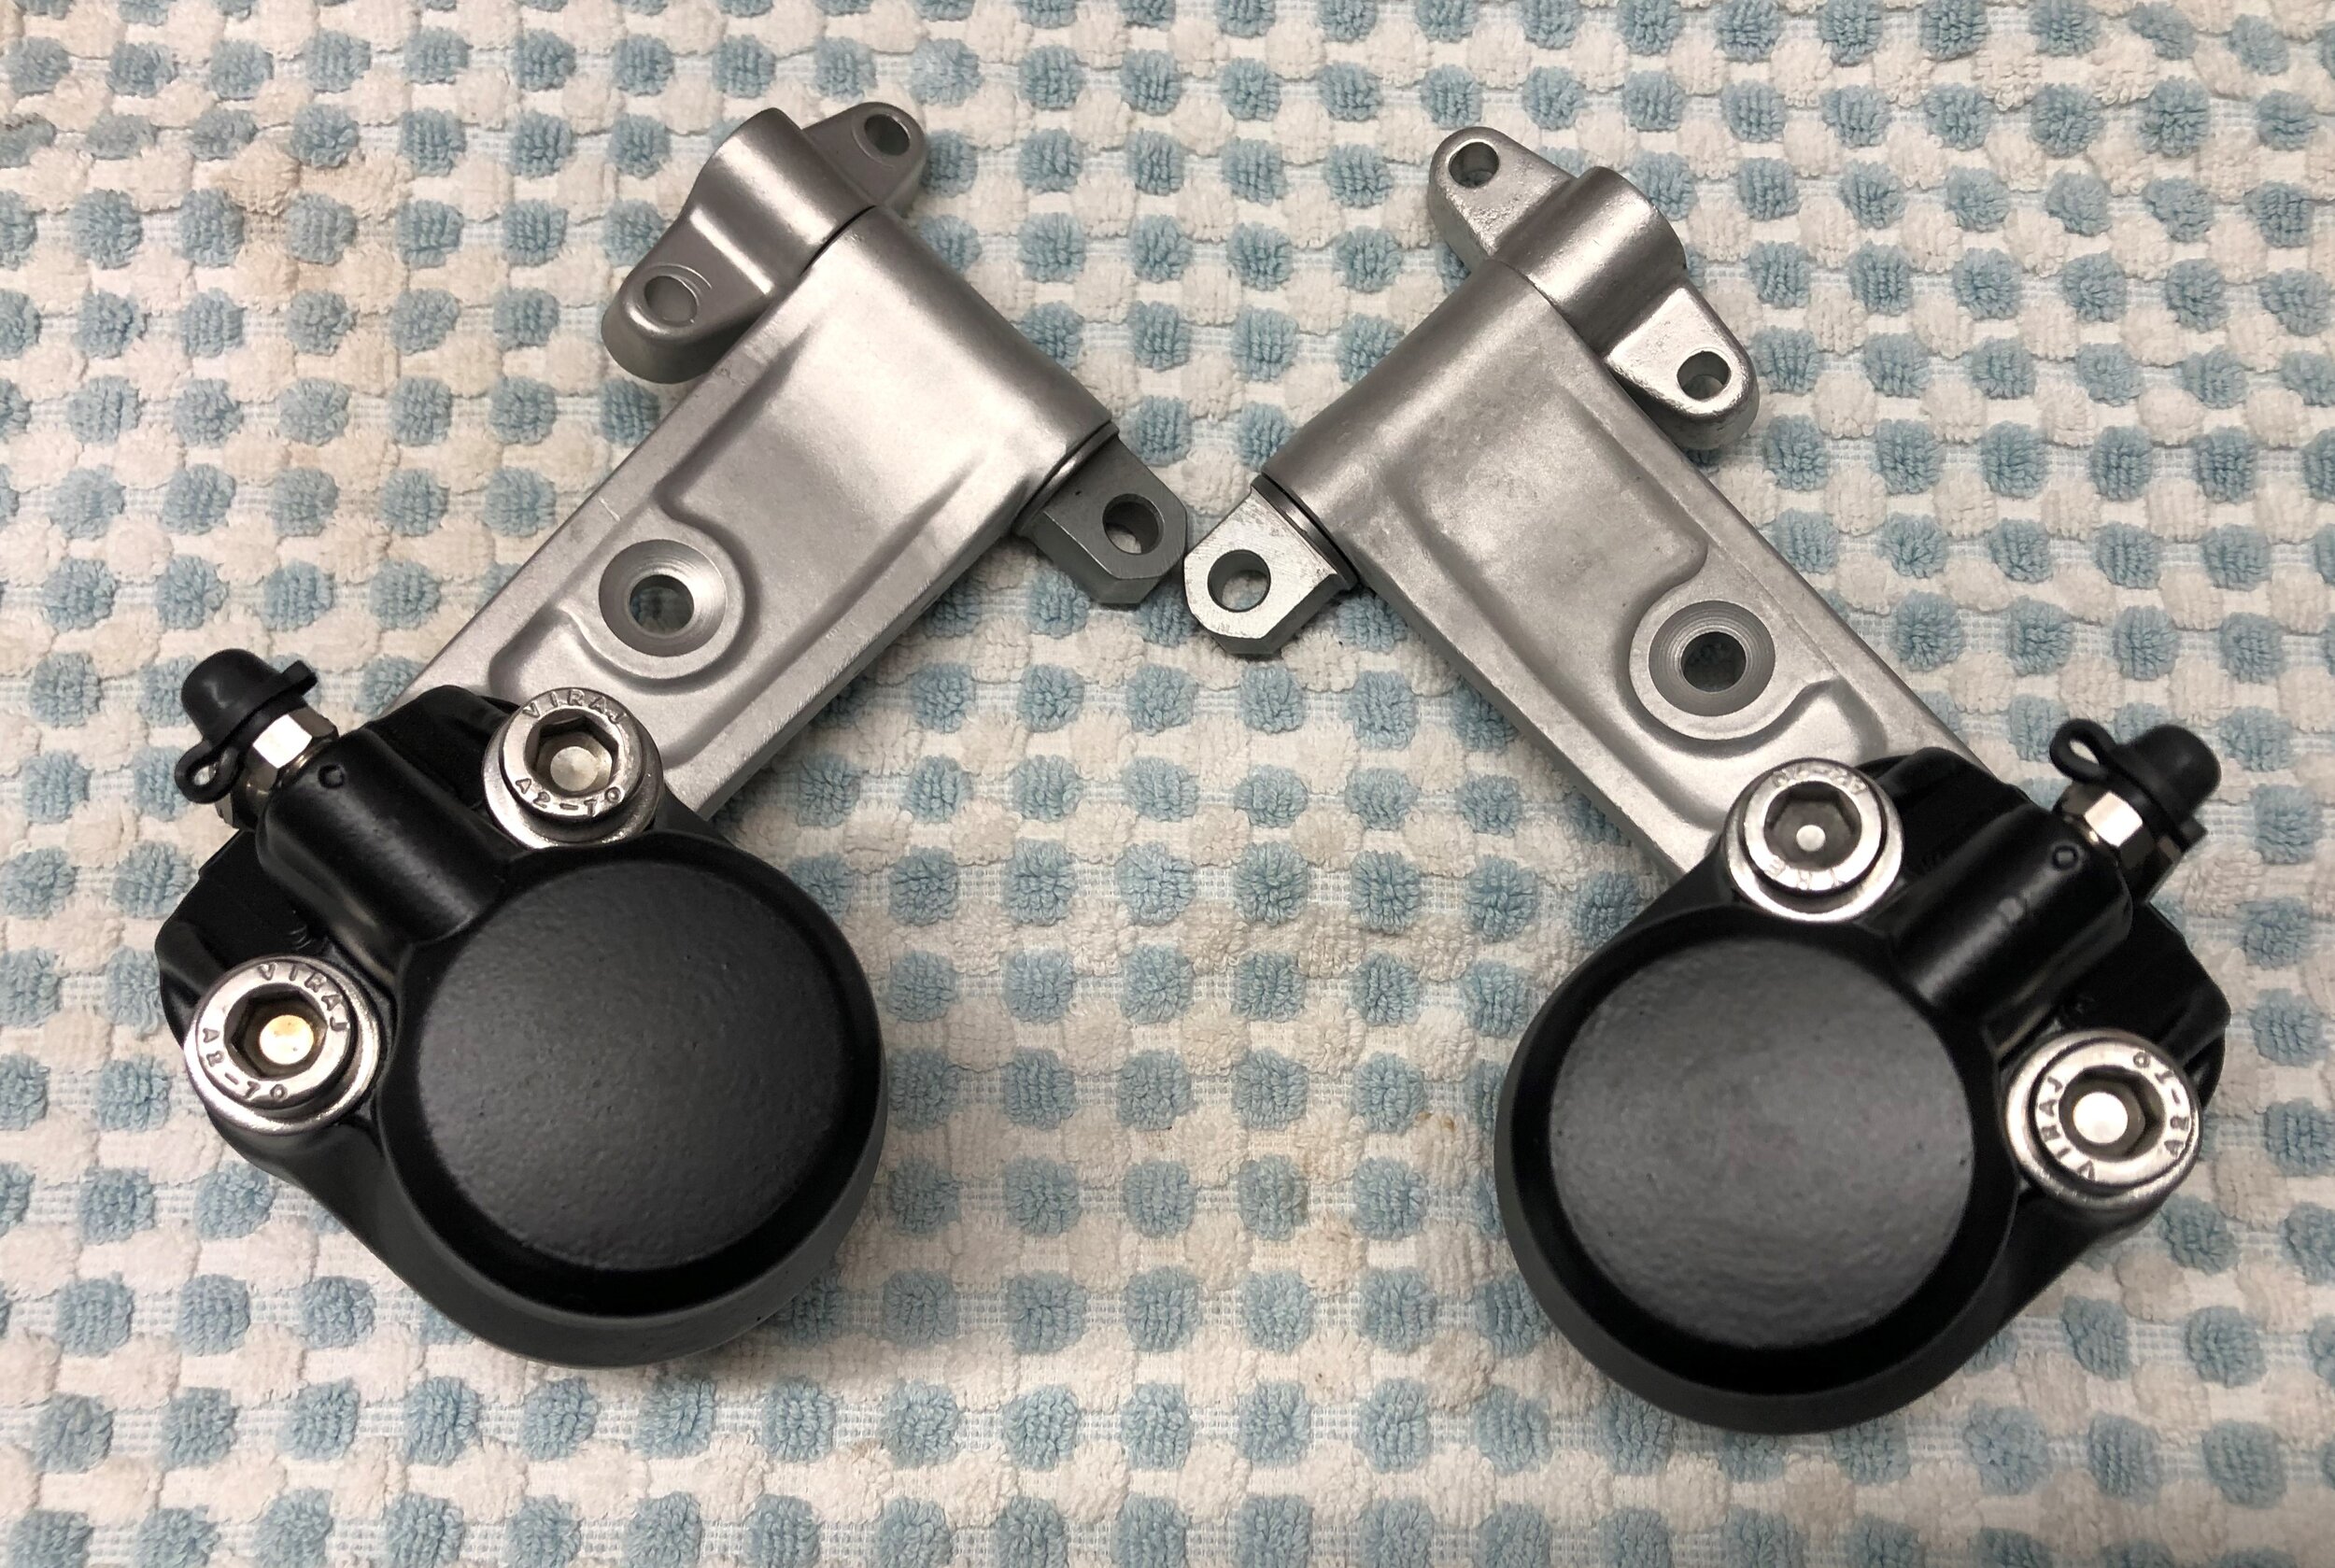
Instead of the standard steel caliper bolts I ordered some A2 stainless hex bolts (M10 x 70mm). These are fine pitch (1.25mm) not the usual 1.5mm pitch. I also used some A2 stainless washers that I had. I couldn’t find any A4 stainless bolts less than £20 for 4. The OEM bolts are around 73mm long so my 70mm bolts don’t quite use all the thread on the half shell. 75mm bolts would poke out by 1.25mm but if doing things again I’d go for them.
As usual, the threaded section on “off-the-shelf“ bolts doesn’t match the OEM part. I used some JB Weld SteelStik on the threads to pad them out & strengthen the bolts. You have to be quick as it sets fast. No need to be super tidy as it’s easy to grind smooth.
To bolt the discs to the centres I used A4 stainless steel button head bolts (M6 x 20mm), stainless nyloc nuts & washers. All torqued down to 13nm. A serious amount of work but I’m super happy with the end result.


Converting the front hub for dual disc / caliper
The forks on my bike already have fixings for a second caliper and a helpful article from Black Square Motorcycles (site now closed down) showed exactly how to do the conversion. The main work is adapting the front wheel hub / tach gear housing to accept a second caliper. Since I was removing the cable tach drive anyway, things were a bit easier for me.
Unfortunately, I have what they described as an “oval” hub so their set-by-step instructions and spacer specs didn’t work for my wheel. After a little head scratching and Googling I found a company in the states called J Webster Designs who makes billet alloy parts for tachometer delete - a spacer for the front wheel hub and a plug on the top of the engine. Both at a reasonable price of $44.95 and $14.95 respectively, around £48 plus £19 postage and £19 import fees. Justin is a nice guy and replies real quick to questions.


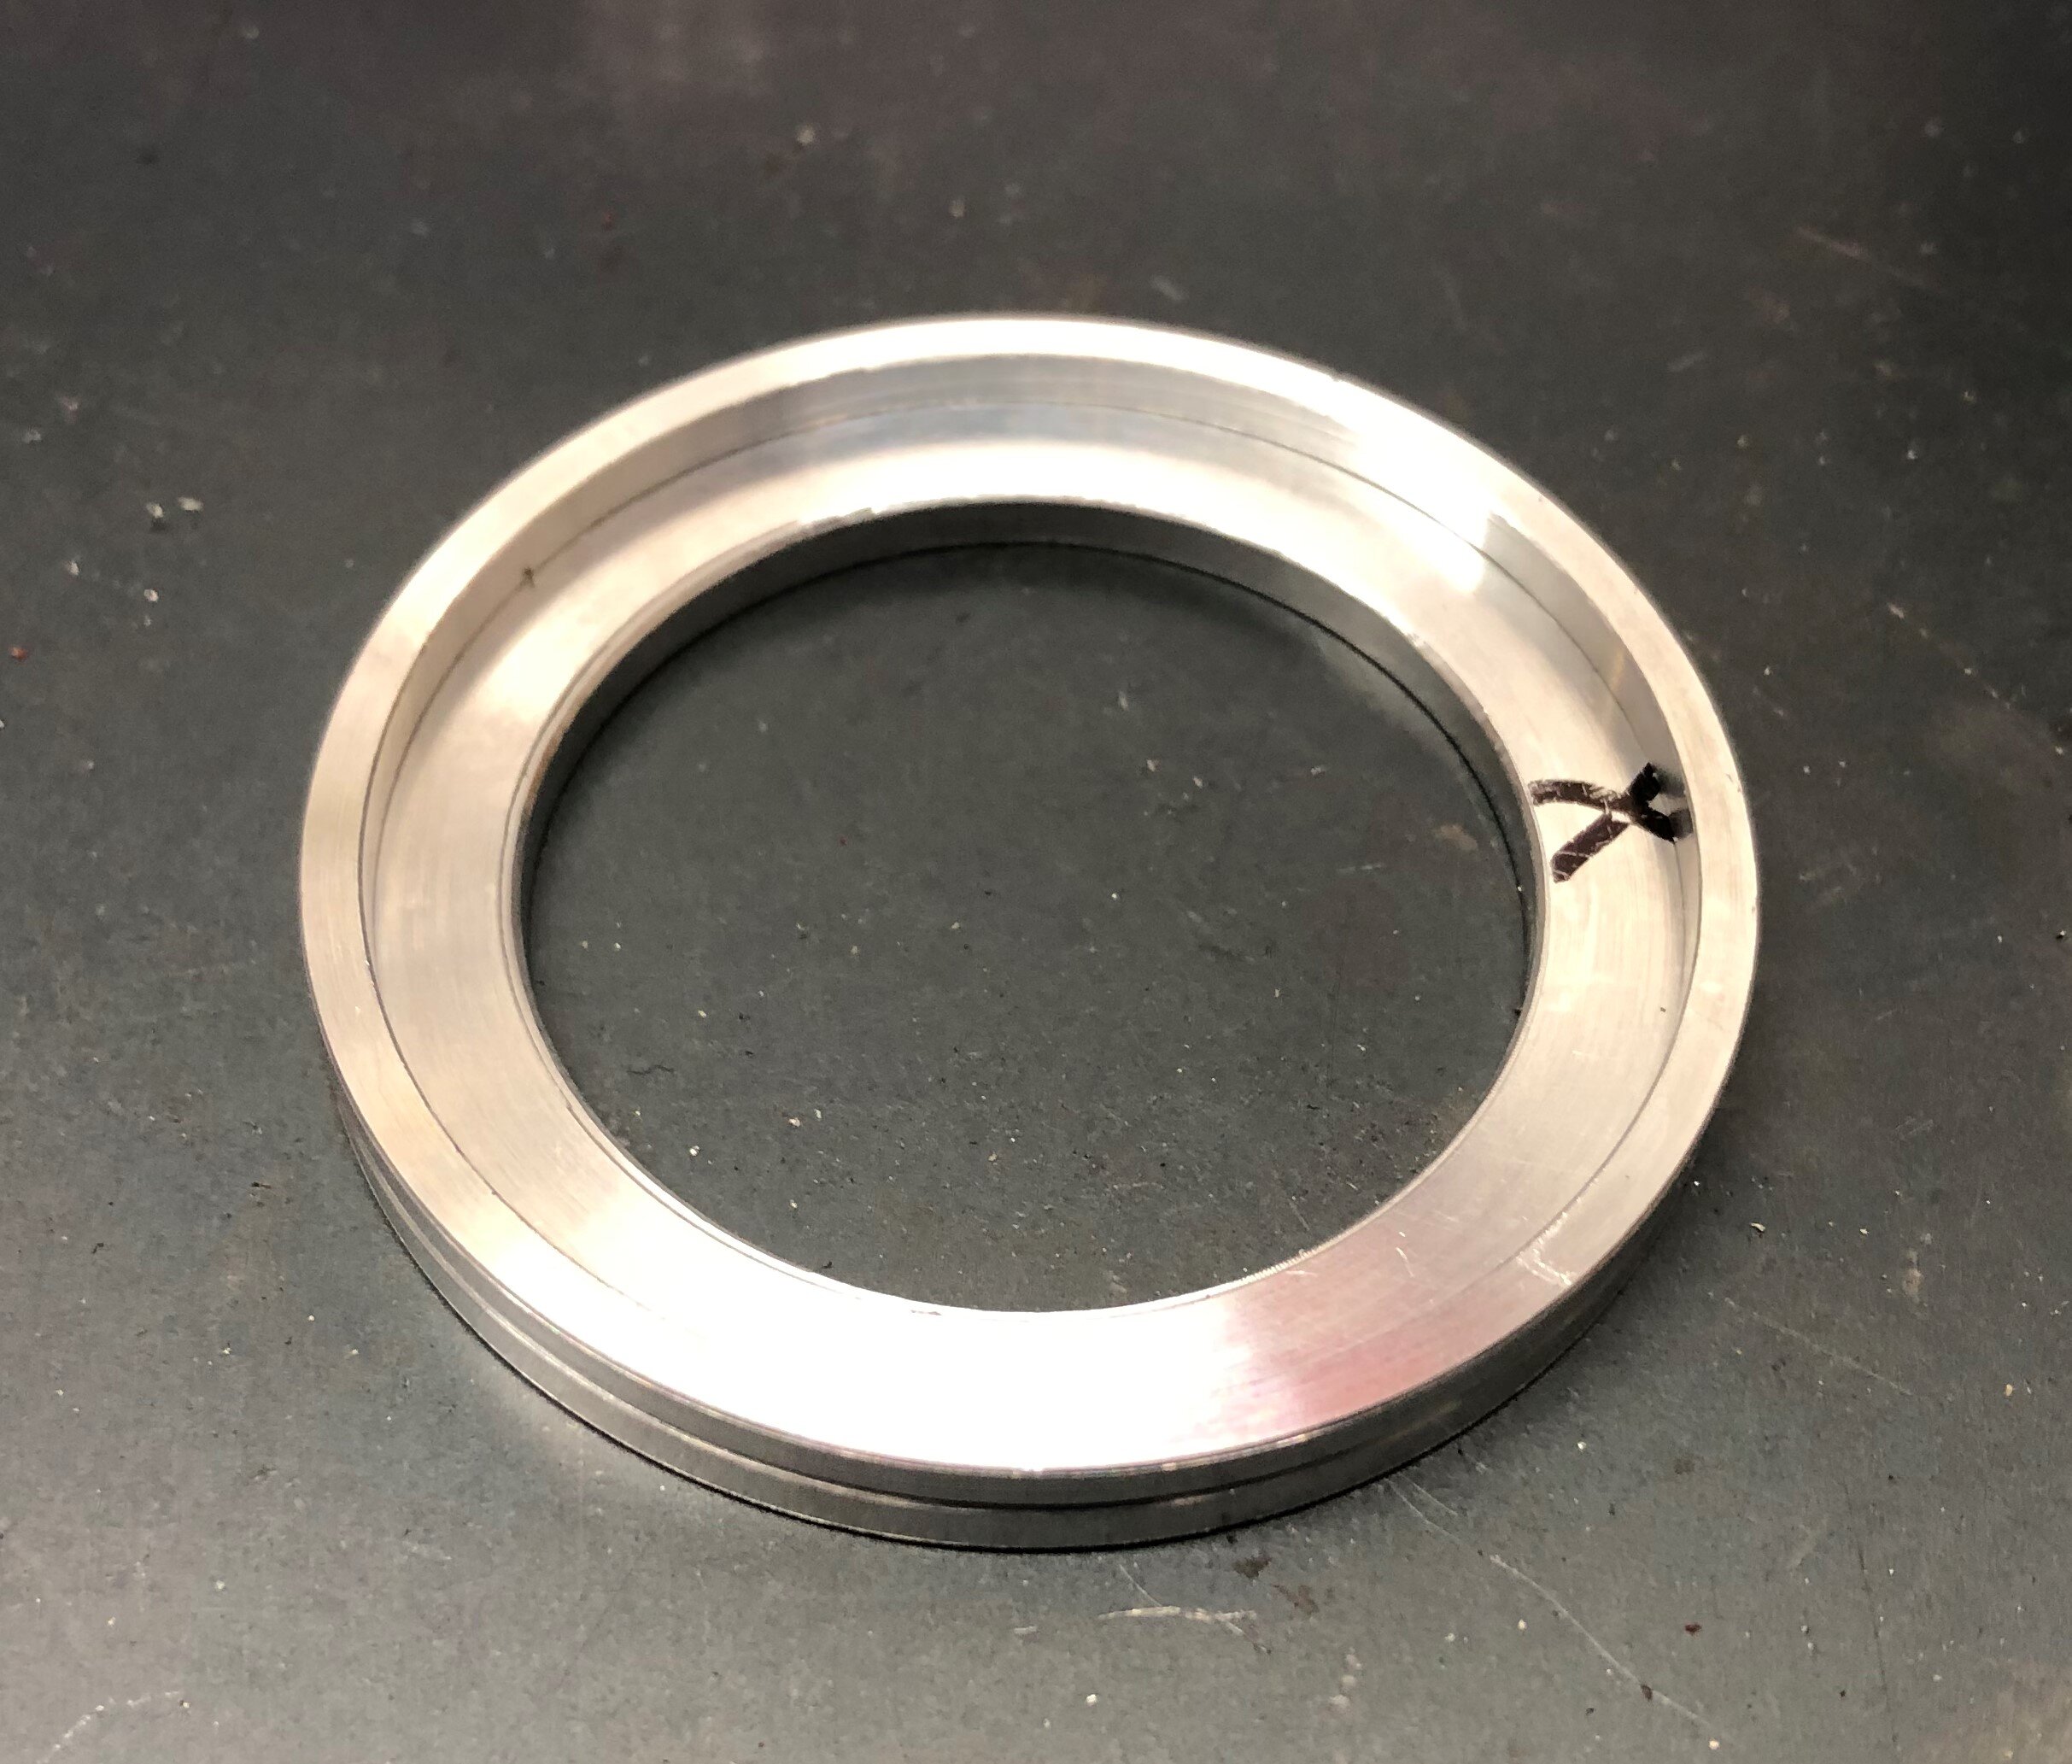
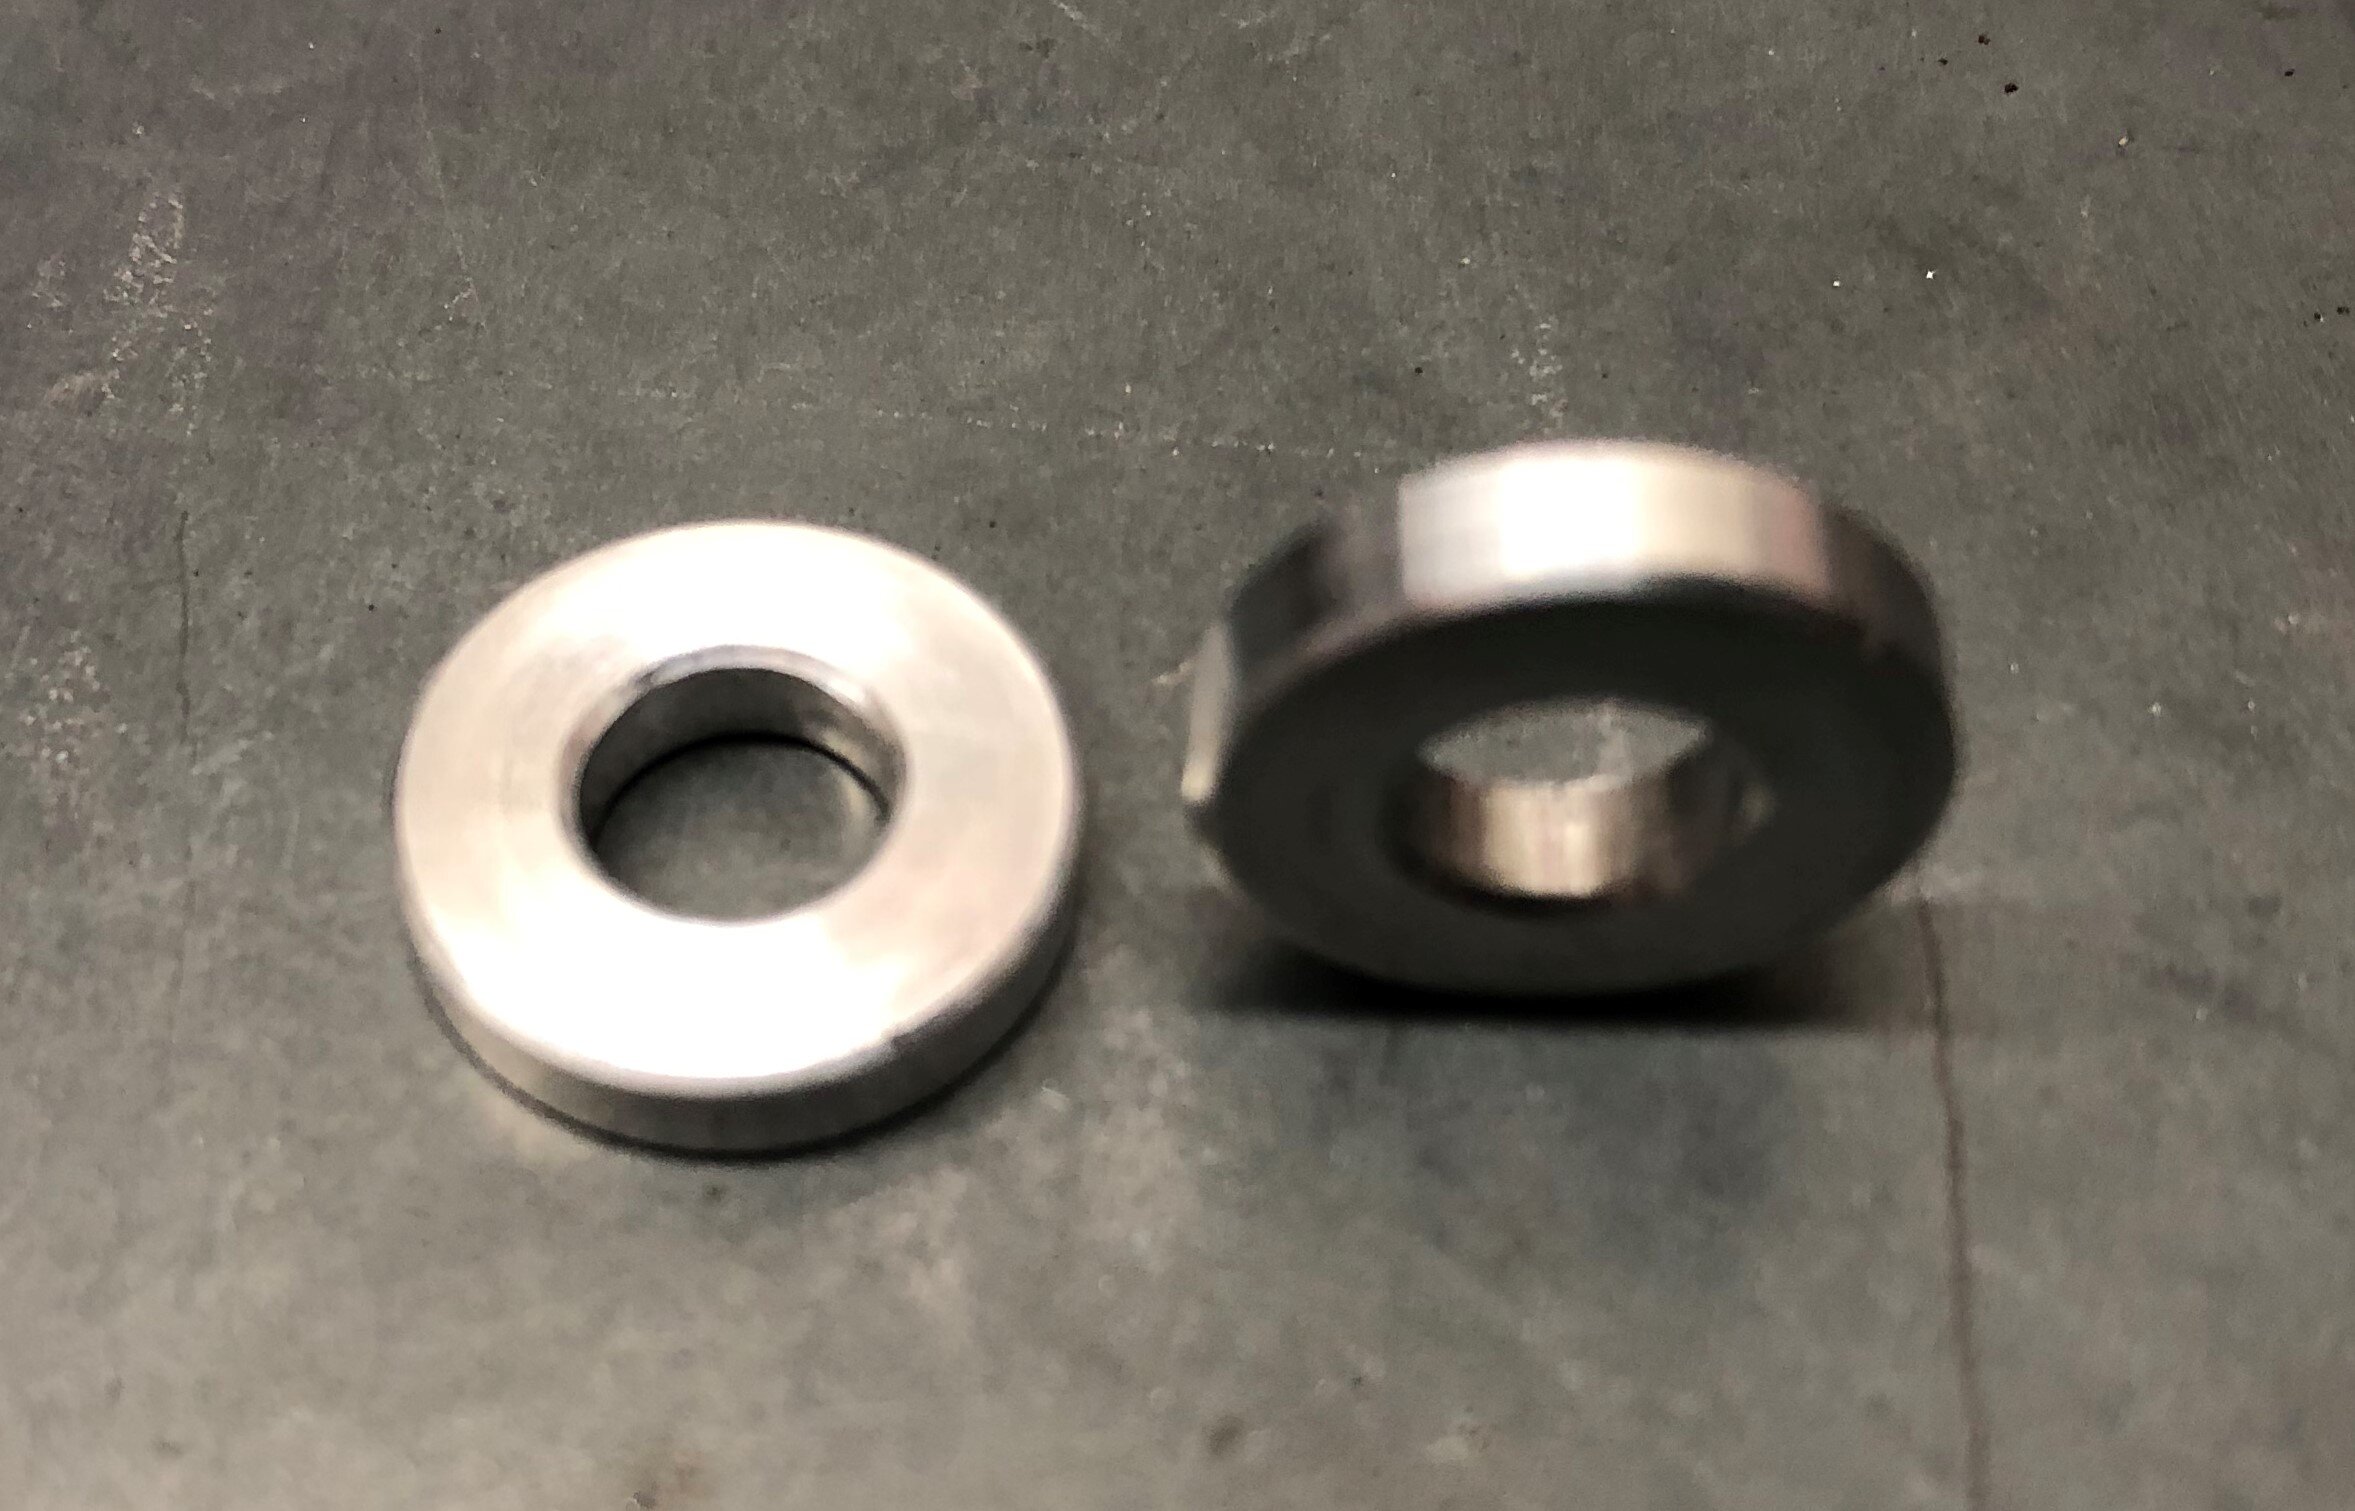
The tach delete spacer isn’t designed for a second disc on the right hand side (RHS). It fits but leaves a little over a 3mm gap between the tach delete spacer and the wheel hub / brake disc. Left like that dirt, water etc would get into the bearing so I found someone on eBay that does custom 3mm thick aluminium washers (bushes2u). I got two 60mm OD washers, one with 43mm ID and another with 55mm ID - £30 for both. The inner, wider washer fills the gap between hub and tach delete and the outer washer sort of cowls 3mm (ish) around the tach delete spacer. The hub remains static but the spacer and cowl spins with the wheel so needs to clear the hub. To secure it I drilled and countersunk 4 x 3mm holes in the wide spacer and 2.5mm holes into the hub. I then used a 3mm tap (primary then bottom) to thread the holes then fixed it with M3 x 6mm A4 stainless countersunk allen bolts. I then bonded the two washers with JB Weld (epoxy resin) to make a single piece. It looks super smart but we’ll see how it fairs when I start putting some miles on her. I just hope it keeps the grit and water out. I also used a bearing seal for the left hand side (LHS) to sit up against the bearing and give some extra protection if anything does get in.

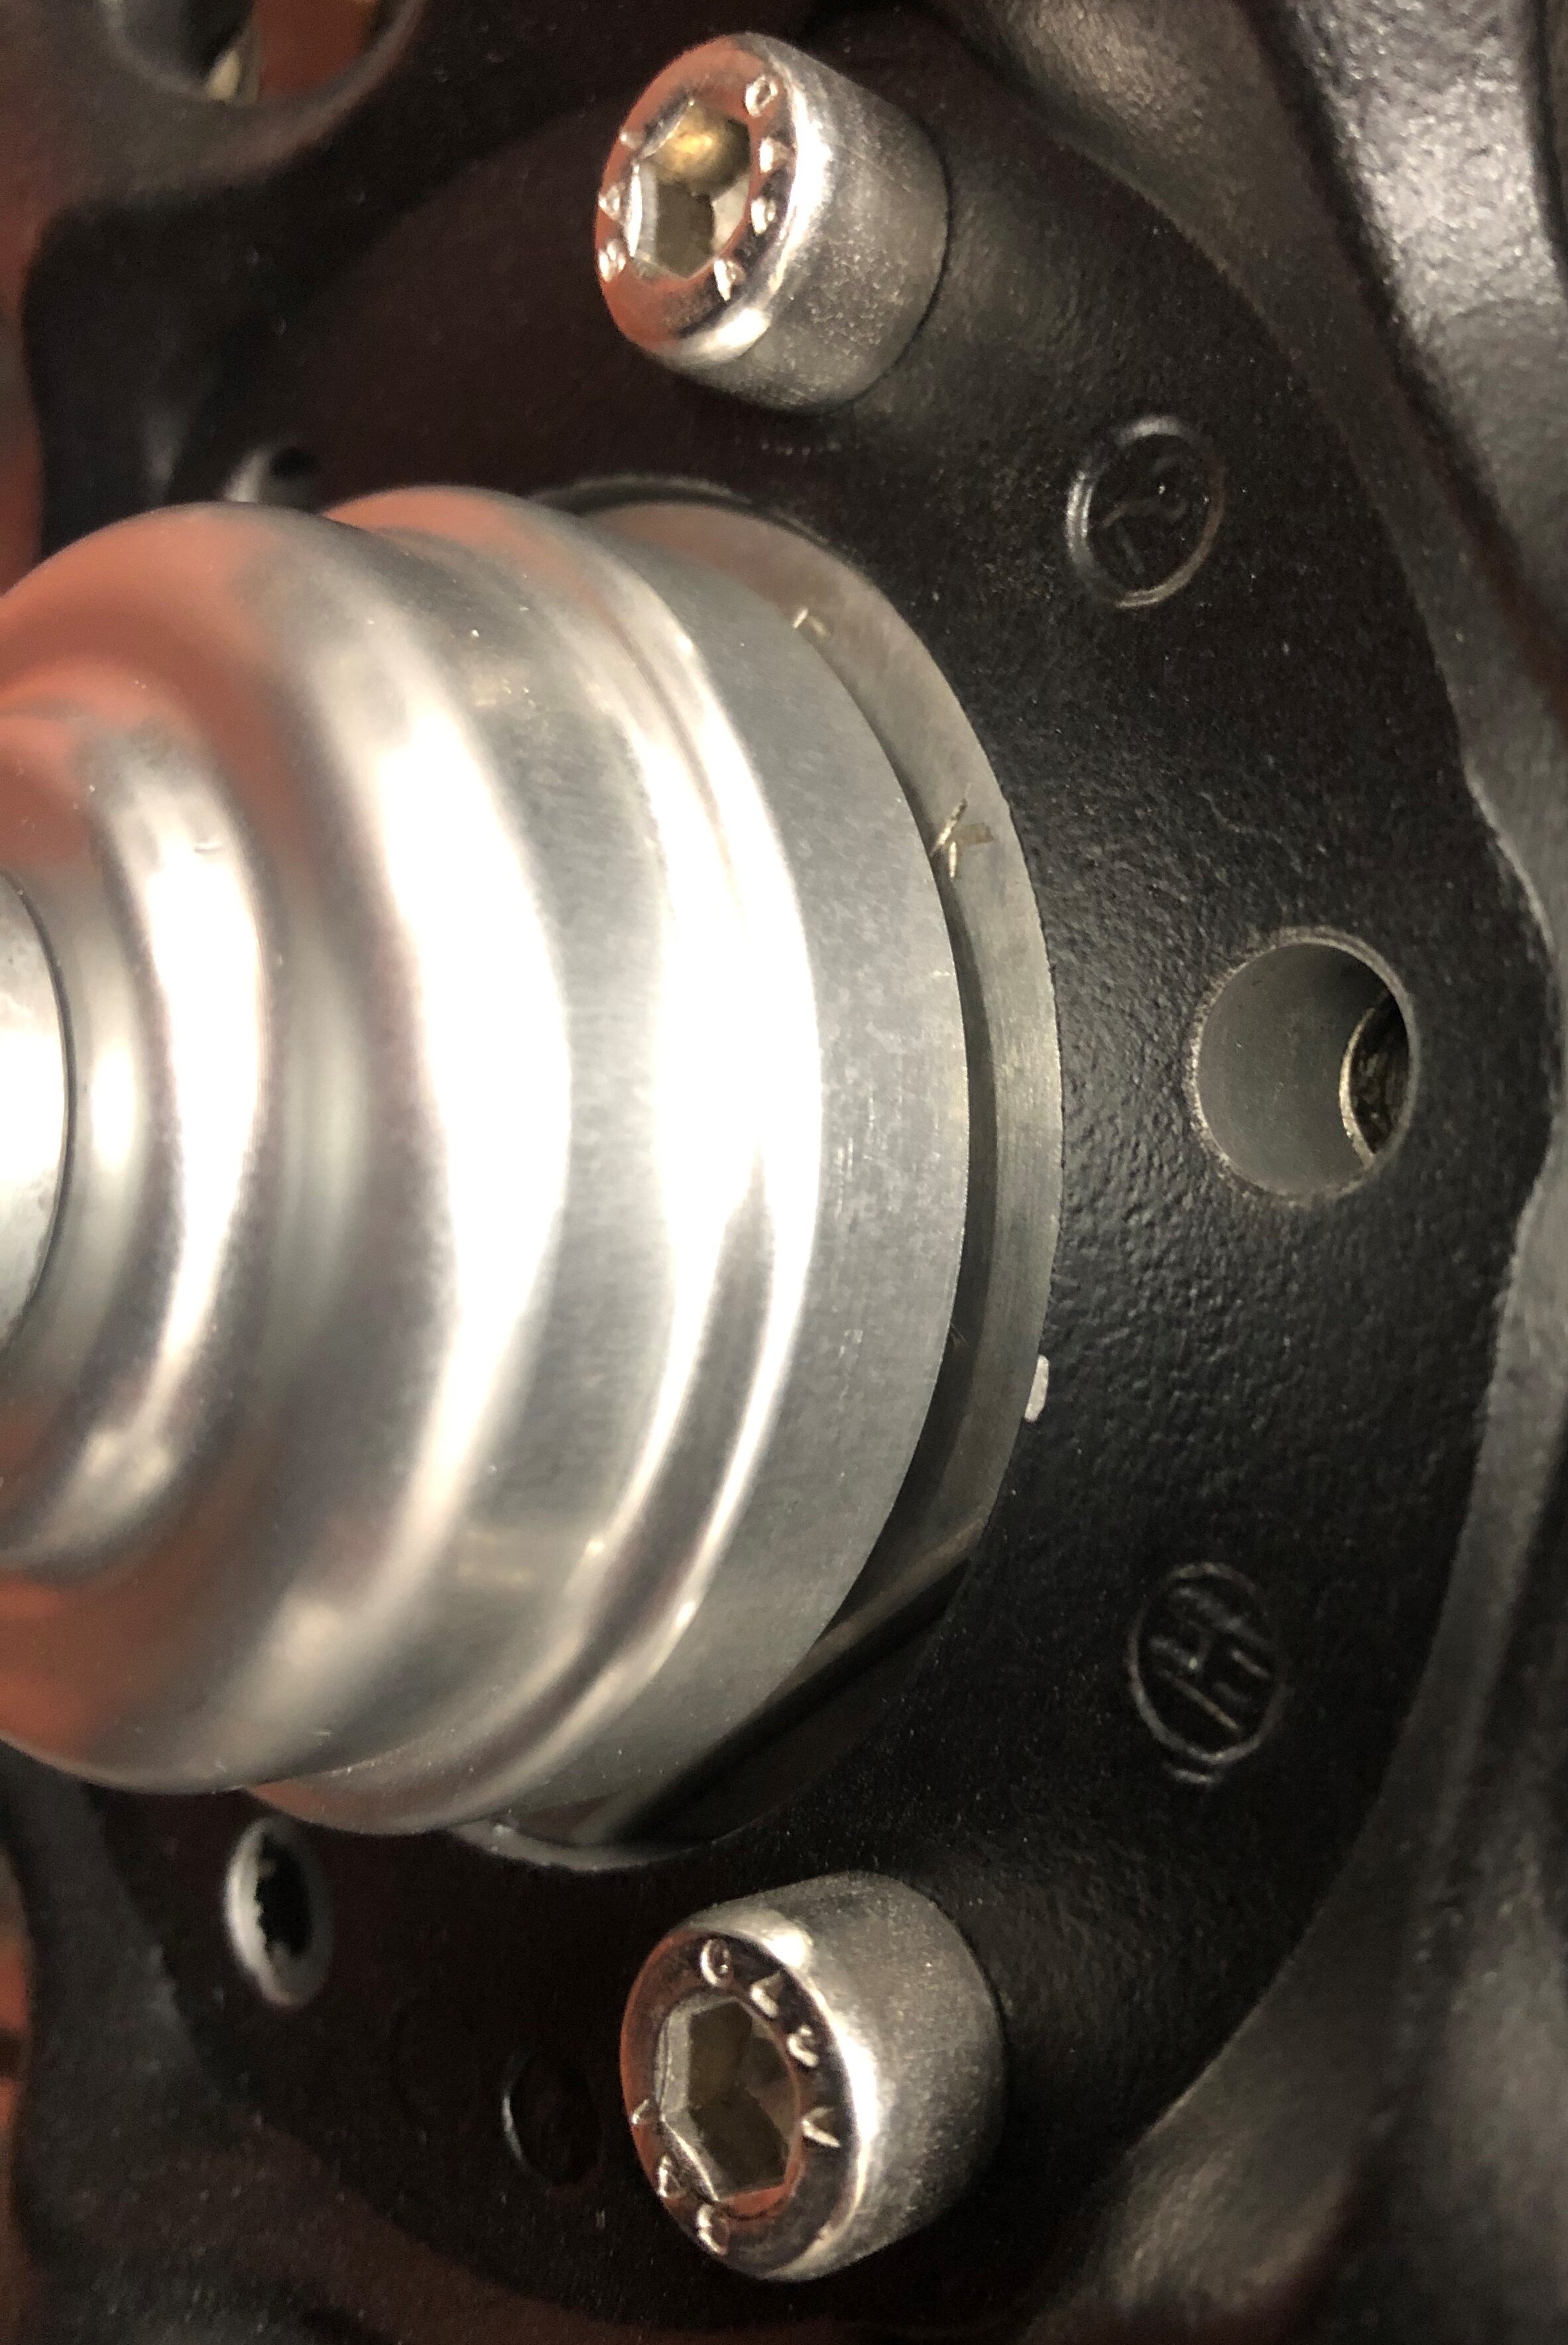


With my hub, the second disc on the RHS sits 3mm closer to the wheel than the stock set-up on the LHS. That’s not a problem, the caliper half shell still clears the spokes and you’d have to be pretty eagle eyed to notice the difference. Although the RHS stantion has mounts for a 2nd caliper, it’s not 100% symmetrical to the LHS where the stock caliper mounts. The lower M8 bolt mount is 3mm longer on the RHS. This is great because the disc sits 3mm closer to the wheel so it all marries up perfectly. However, the two upper caliper mounting M6 bolts are the same as the LHS (for some reason!) so they’re 3mm too short. Most people seem to use the mudguard / fender mounting bracket to fill up some of this 3mm and shim with spacers to fill in the rest. I decided to order 2 x 3mm aluminium stand-off spacers with an OD of 14mm - the same as the stantions. My fender mount was customised and made symmetrical so couldn't be used as a spacer. Also, they look cool and are the exact size for the job - which is important with brakes.

All the articles say that you need longer bolts to accommodate the 2nd disc. The stock ones are 102mm, you’ll need 110-112mm ones. As someone pointed out on a forum, GL1000 bolts work here but they’re discontinued. Most stock 110mm bolts have around 25-30mm of the bolt threaded where the OEM ones have only the last 10mm - just enough for the nut. The full shaft diameter & strength is used to secure the disc. I was keen to have an OEM bolt but the cheapest 2nd hand set I could find was around £45 and a custom stainless set would have been around £60-£70 - far too much for 6 bolts. I ended up buying a set of 10, M8 x 110mm A4 stainless bolts on ebay for £11.85 and used some M8 A4 stainless nyloc nuts instead of the stock tongued washers.
Flipping / reversing the brake calipers
A popular mod seems to be swapping the forks around so the calipers are mounted to the lower rear (like all modern bikes). It seems that this helps with handling as opposed to braking - better centre of gravity and fork compression under heavy braking. It also helps my custom set-up by needing shorter brake lines and no need to route them through the forks.
All the info above about LHS vs RHS spacing is with the forks in the stock position i.e disc and caliper on the LHS and tach drive on the RHS. I flipped my forks and spun the wheel around to shift the calipers to the rear. Apparently, if you do this with the geared tach drive it’ll go in reverse but as i’m going digital, it’s not a problem. Also, if you have directional tyres, they’ll be facing the wrong way. I’m getting my hubs re-laced and new tyres so that’s not a problem either.
If you keep the geared tach and flip the forks but not the wheel then, due to the asymmetrical spacing on the caliper mounts this would mean getting the stantion with the 3mm longer mount machined down. The other side would need a spacer at the hub and/or at the caliper mounts. I found that the hub axle didn’t line up well so I suspect you need to tach delete if you do want to flip the forks. Here’s a SOHC4 forum thread.
Honda CBR600 master cylinder rebuild
To keep things Honda but more modern and able to cope with two calipers I went with a 1999 F4 CBR600 master cylinder. Still a little old-skool but more modern than the 70’s stuff. Levers on a bike are important to me. I like short, adjustable ones as I tend to brake with 2 fingers and find the non-adjustable levers on older bikes too far away for me. I got a used set of master cylinder, clutch perch and levers on eBay for £48. The levers were gold so they got punted and I got some black ones with sliver adjusters from AS3 Performance.
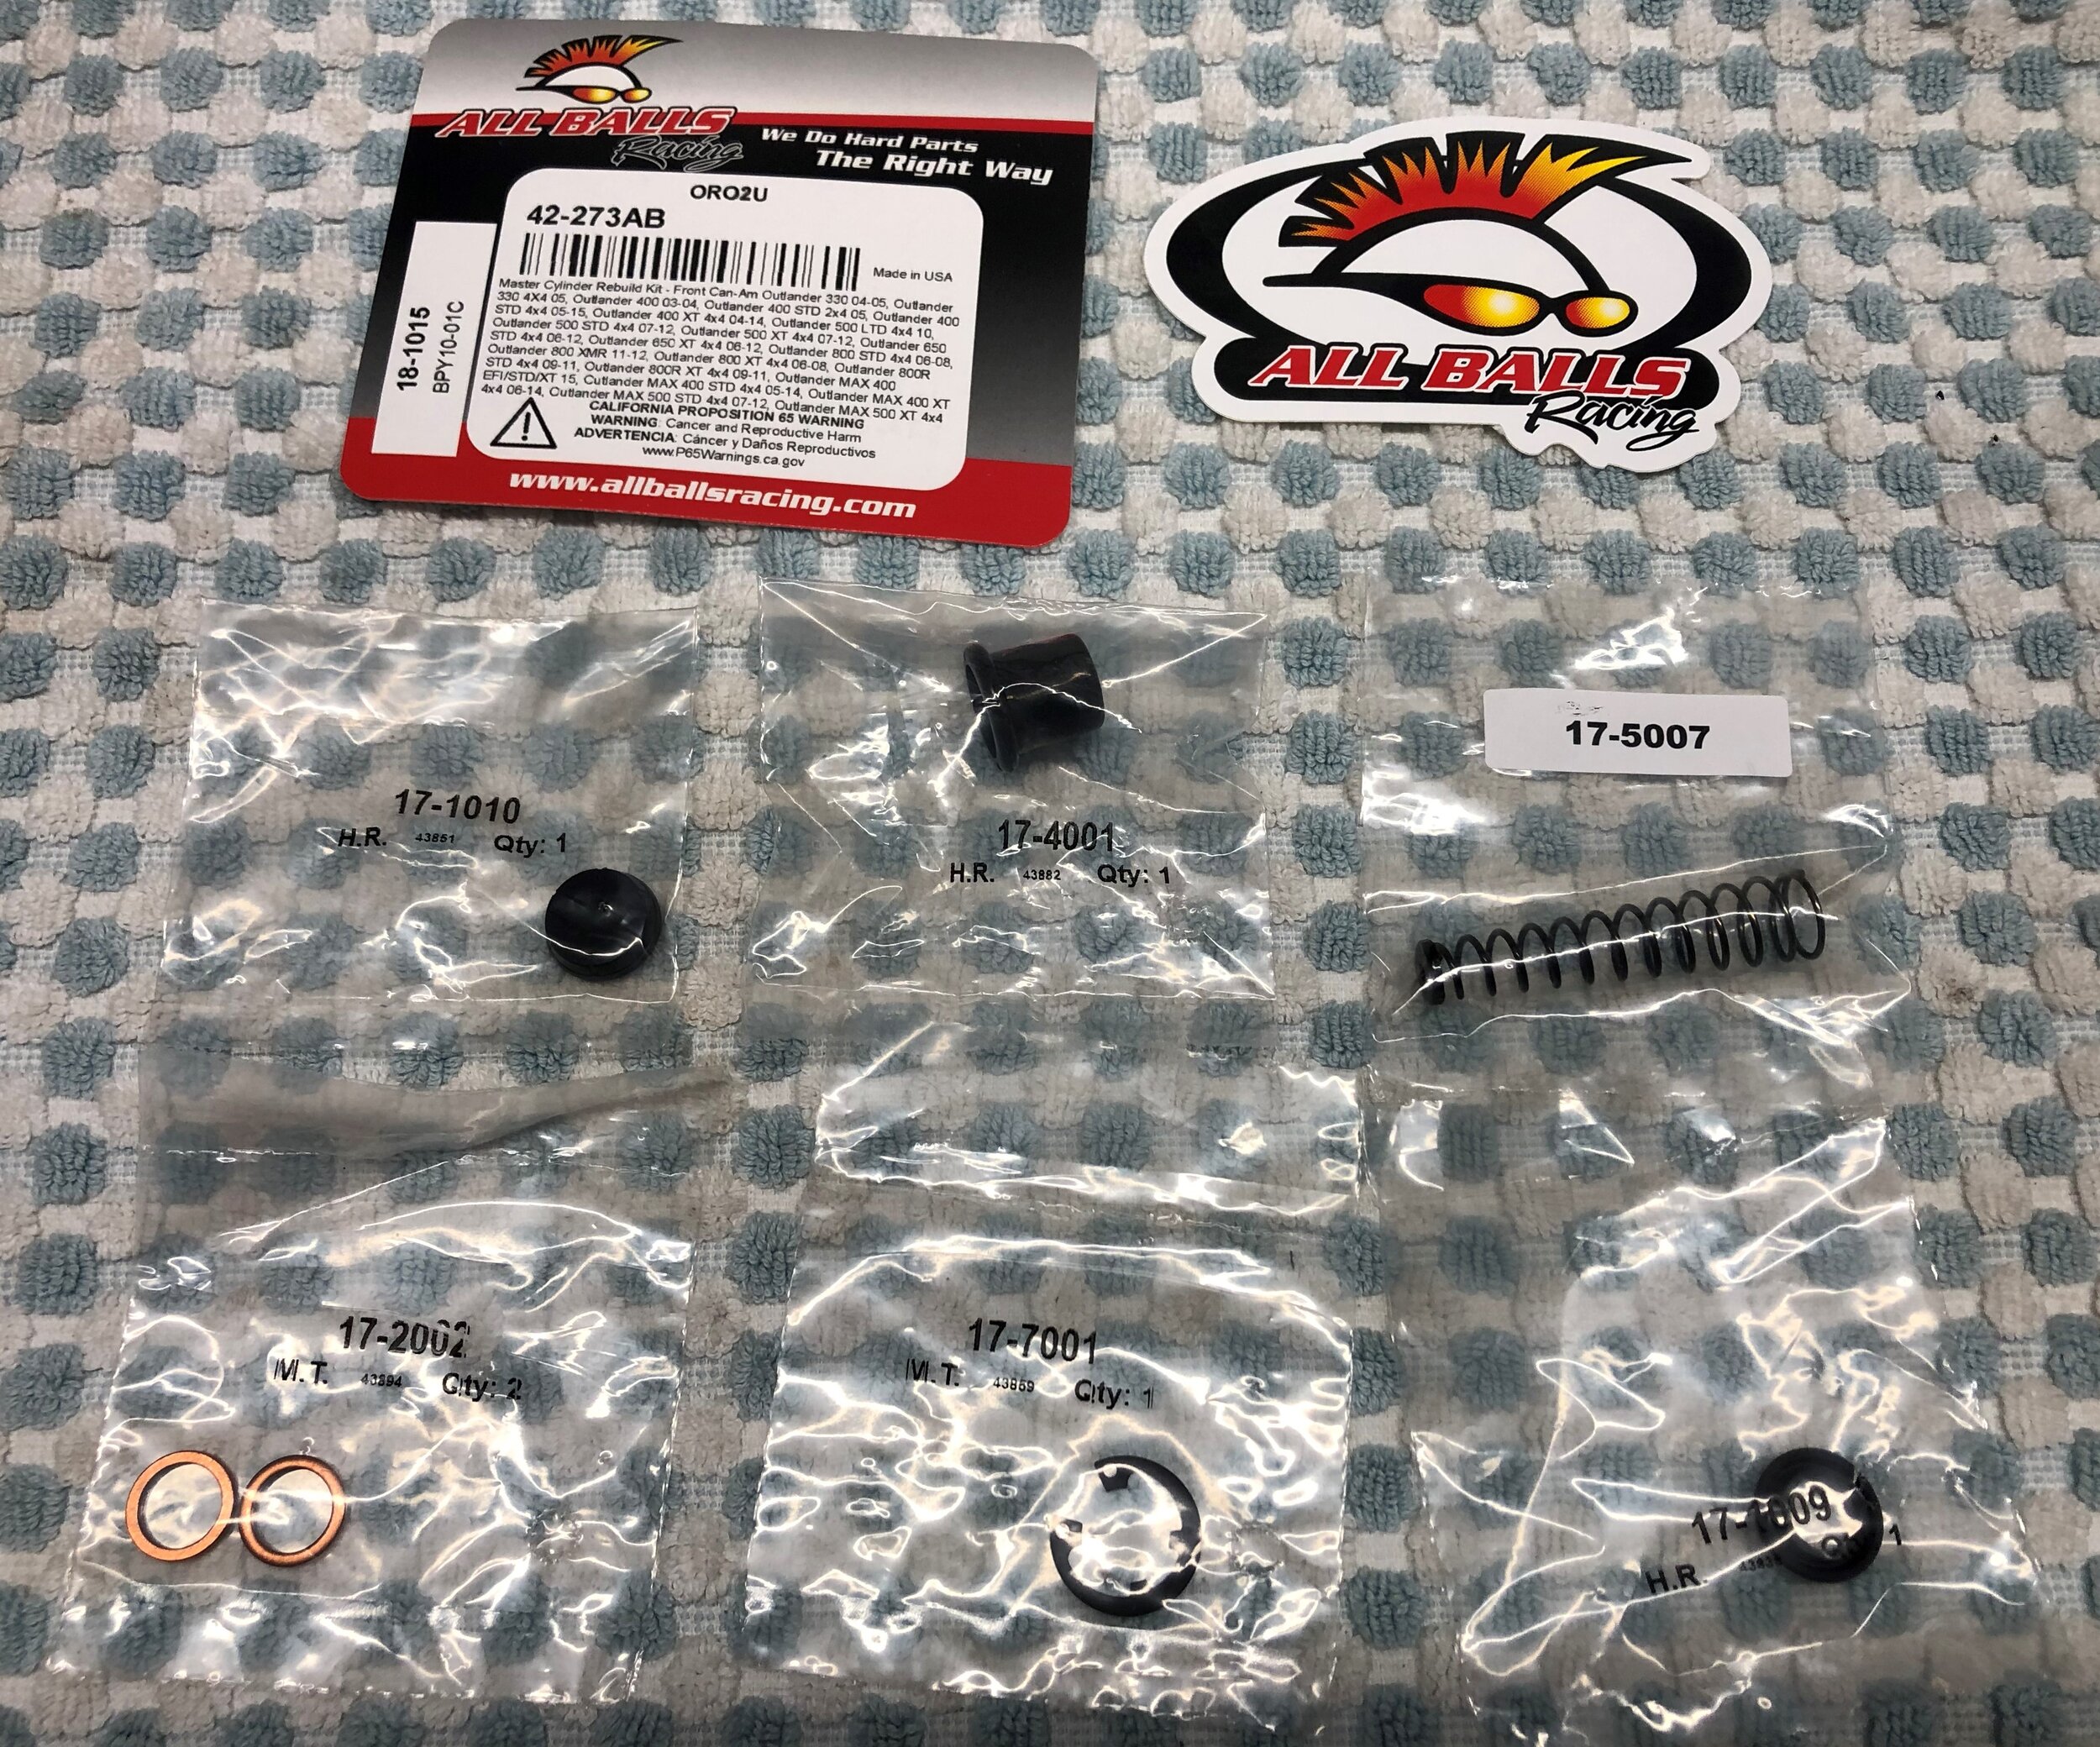
I didn’t plan on rebuilding the master cylinder but the gaiter was ripped so I decided to get an All Balls Racing re-build kit (18-1015) on eBay for £17. I only found out after ordering that there’s no replacement metal piston in this kit. Mine seemed okay so I cleaned it up and re-used it. An OEM replacement kit from David Silver has everything for a few quid more. I also ordered a couple of stainless reservoir screws.


I’d never stripped, cleaned & rebuilt a master cylinder before so found this YouTube clip handy. It’s really straightforward - just take a photo of the old assembly / order before stripping down.
Assembling the brake lines & bleeding
I’ll finish this section when I re-assemble the bike, measure and order brake lines. You can’t adjust buildaline hoses so you need to order the correct length.
Sometimes, with fresh brake lines, they don’t bleed easily as there’s too much air in the line. The easiest way to bleed an empty line is to draw the air & fluid from the bleed nipple using a rubber tube and plastic syringe. Once the fluid starts to come through, bleed it the normal way.
Summary
The front brakes & twin disc conversion has been a serious amount of work and around £600 in parts. The extra caliper (1.3kg) and disc (2.4kg) adds around 3.7kg of sprung weight. However, I saved around 1.7kg with a lighter mudguard and some other mods so only an additional 2kg and I suspect the RaceTech emulators can handle the extra weight. I think the end results looks great and worth the effort for improve braking.
Useful links:
https://www.cmsnl.com/honda-cb550-four-1975-cb550k0-usa_model465/partslist/F++10.html